
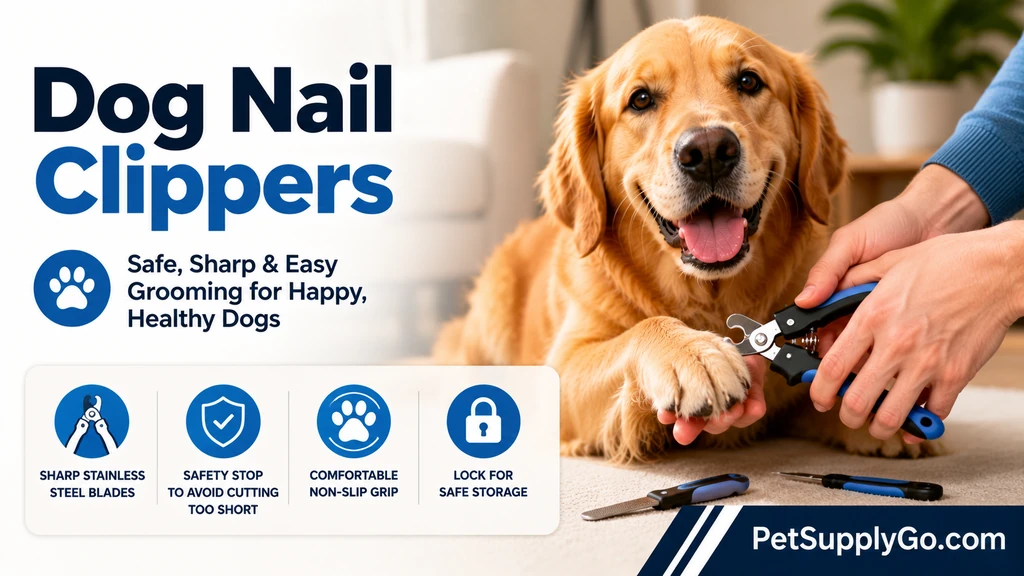
Click, click, click. That is the sound of dog nails on a hardwood floor, and if you hear it from the next room, it is a sign that your dog is overdue for a trim. It is also, for a lot of owners, a sound they would rather ignore, because cutting a dog’s nails can feel genuinely scary. What if you cut too short? What if your dog yelps, pulls away, or bites? What if you hit the quick and there is blood everywhere?Take a breath. Nail trimming is one of those jobs that sounds worse than it is. With the right tool, a calm approach, and a little practice, most owners can do it safely at home. And it matters. Overgrown nails are not just noisy. They change how your dog stands and walks, strain joints, and can split, snag, or even grow into the paw pad.
This guide covers everything: why nails matter, how they are built, how to tell when it is time, what types of dog nail clippers and grinders exist, how to choose the right one for your dog’s size and nails, exactly how to trim light and dark nails step by step, what to do if you nick the quick, and how to help a dog who hates having their paws touched. It is long because dogs and owners vary, so use the contents list to jump to what you need.
The short answer: To trim a dog’s nails safely, choose a sharp clipper (scissor-style or plier-style for most dogs) or a quiet grinder sized for your dog, and have styptic powder on hand. Hold your dog’s paw gently, trim only the tip of the nail in tiny snips, and stop before you reach the quick, the pink area containing blood vessels and nerves. On clear nails you can see the quick. On black nails, trim a little at a time and stop when you see a dark dot or a chalky white ring in the center of the cut surface. Reward your dog with treats throughout. Most dogs need a trim every three to four weeks. If you cut the quick, apply styptic powder or cornstarch with gentle pressure, stay calm, and call your vet if bleeding does not stop in about ten to fifteen minutes.
This guide also covers dewclaws, puppies, small and large dogs, seniors, dogs with black nails, how to train a nervous dog to accept trims, paw care, nail problems that need a vet, and what to ask a groomer. There is a four-week training plan and a shopping checklist near the end.
Key Takeaways
- Regular trims protect your dog’s posture, joints, and paws. Long nails force the toes to splay and can make walking uncomfortable.
- Most dogs need a trim every three to four weeks, but active dogs who walk on pavement may need fewer, and indoor dogs may need more.
- You should not hear loud clicking on hard floors, and nails should not touch the ground when your dog stands normally.
- The quick is a bundle of blood vessels and nerves inside the nail. Cutting it hurts and bleeds. On clear nails, you can see it. On black nails, you cannot, so trim tiny amounts.
- The best tool is the one you can use confidently and your dog tolerates. Scissor-style and plier-style clippers suit most dogs, and grinders are a good option for black nails and nervous owners.
- Size matters. A clipper too small for a large dog crushes nails, and a clipper too big for a small dog is hard to control.
- Sharp blades matter. Dull clippers squeeze and splinter nails, which hurts.
- Always keep styptic powder or cornstarch nearby. Nicks happen to everyone.
- Fear is learned, and it can be unlearned. Go slowly, use treats, and break the job into tiny steps.
- Do not forget dewclaws. They do not touch the ground and can curl into the leg.
- See your vet for torn nails, bleeding that will not stop, signs of infection, or nails that have grown into the pad.
Contents
- Why Trimming Your Dog’s Nails Matters
- The Anatomy of a Dog’s Nail and the Quick
- Signs Your Dog’s Nails Are Too Long
- How Often to Trim Dog Nails
- Types of Dog Nail Trimmers
- Scissor-Style and Plier-Style Clippers
- Guillotine Clippers
- Nail Grinders
- Nail Files, Boards, and Natural Wear
- How to Choose the Best Dog Nail Clippers
- Sizing: Small, Medium, Large, and Giant Dogs
- Features Worth Paying For
- Blade Care and When to Replace
- Everything You Need Before You Start
- Setting Up and Positioning Your Dog
- How to Trim Dog Nails With Clippers, Step by Step
- How to Use a Nail Grinder, Step by Step
- Trimming Light Nails
- Trimming Black Nails
- Dewclaws
- Nail Trimming for Puppies
- Small and Toy Breeds
- Large and Giant Breeds
- Senior Dogs and Dogs With Arthritis
- Dogs Who Hate Nail Trims
- A Desensitization Plan for Nervous Dogs
- What to Do If You Cut the Quick
- Nail and Paw Problems to Watch For
- Paw Care Routine
- Walking Surfaces and Natural Wear
- Professional Trims: Groomers and Vets
- Cleaning and Storing Your Tools
- Common Mistakes
- Troubleshooting Common Problems
- When to Call a Vet
- A 4-Week Nail Trim Training Plan
- Shopping Checklist
- Final Thoughts
- 30 Frequently Asked Questions
Why Trimming Your Dog’s Nails Matters
It is easy to treat nail trims as a cosmetic chore. They are not. They are basic health care.
Posture and Gait
A dog’s nails are meant to stay short enough that the pad takes the weight. When nails grow long, they touch the ground first. That pushes the toes upward and backward and changes how the whole foot lands. Over time, this can alter the way your dog stands and walks.
Joint and Muscle Strain
Walking on long nails is a bit like walking in shoes that are the wrong shape. The altered angle puts extra stress on the toe joints, wrists, elbows, and even the shoulders and hips. In older dogs and dogs with arthritis, long nails can make existing discomfort worse.
Slipping and Reduced Traction
Long nails can reduce grip, especially on smooth floors. Dogs may slip, skid, or hesitate on stairs and tile. Senior dogs are especially vulnerable to slipping injuries.
Splitting, Tearing, and Breaking
Long nails snag on carpet loops, fabric, grass, and cracks in the sidewalk. A caught nail can tear, split, or break, which is painful and often bloody. Torn nails commonly need veterinary care.
Ingrown Nails
If nails are never trimmed, they can curl around and grow into the paw pad. This is painful and can lead to infection. It is most common with dewclaws, which do not wear down at all.
Painful Scratches
Long, sharp nails can scratch skin, floors, furniture, and people. Dogs who jump up are more likely to cause injuries.
Comfort
A dog with short nails simply feels better and moves more freely. Many owners notice their dog seems more comfortable and bouncy after a good trim.
The Bonus
Handling your dog’s paws regularly also helps you spot cuts, burrs, cracked pads, and lumps early.
The Anatomy of a Dog’s Nail and the Quick
Knowing what is inside the nail is the key to trimming it safely.
The Parts of the Nail
- The nail itself (the claw): a hard, keratin-based covering that grows continuously.
- The quick: the soft, living core of the nail. It contains blood vessels and nerves. It is pink in light nails.
- The nail bed: the tissue at the base of the nail where the nail grows.
- The pad: the thick, cushioned skin under the toe.
What the Quick Does
The quick supplies blood to the growing nail. Because it contains nerves, cutting into it is painful. It also bleeds readily, often more than owners expect.
The Quick Grows With the Nail
As a nail grows longer, the quick grows with it. That means a long, neglected nail has a long quick. If you cut too close, you hit it. The good news: when you trim regularly, the quick gradually recedes. Over several weeks of consistent small trims, you can shorten the quick and make it possible to keep nails shorter.
Light Nails vs. Dark Nails
- Clear or white nails: You can see the pink quick through the nail. Cut a few millimeters beyond it.
- Dark or black nails: The quick is hidden. You need a different approach (explained below).
Mixed-Color Nails
Many dogs have a mix of light and dark nails on the same paw. Check each nail separately.
Dewclaws
Dewclaws are the small, thumb-like nails higher up on the leg, usually on the inside of the front legs, and sometimes on the back legs. They do not touch the ground and do not wear down.
Nail Shape
Healthy nails are slightly curved and smooth. Brittle, cracked, or discolored nails may point to a problem and deserve a vet visit.
Signs Your Dog’s Nails Are Too Long
You can check in seconds.
The Click Test
If you can hear your dog’s nails clicking loudly on a hard floor, they are probably too long.
The Paper Test
Have your dog stand on a flat, hard surface. Slide a sheet of paper under the front paws. If it catches on the nails, they are touching the ground.
Visual Cues
- Nails that touch the floor when your dog stands normally
- Nails that curve downward or sideways
- Toes that splay apart
- Paws that seem to turn out or tilt
- Nails that extend past the pad
Behavioral Cues
- Reluctance to walk or run
- Slipping on smooth floors
- Limping or favoring a paw
- Licking or chewing at the feet
- Hesitation on stairs
Other Signs
- Scratches on floors or furniture
- Nails snagging on carpets or blankets
- A change in how your dog stands, such as a flatter foot or rocking back on the heels
A Simple Weekly Check
Make it a habit to glance at your dog’s nails every week. Catching length early keeps trims small and easy.
How Often to Trim Dog Nails
There is no single schedule, but there are good guidelines.
General Rule
Most dogs need a trim every three to four weeks. Some do fine with every two to six weeks, depending on how fast their nails grow and how much they wear down naturally.
Factors That Affect Frequency
- Activity and surfaces: Dogs who walk or run on concrete and asphalt wear their nails down naturally. Dogs who mostly walk on grass, carpet, or indoors do not.
- Age: Puppies’ nails grow quickly. Senior dogs are often less active, so nails wear down less.
- Breed and genetics: Some dogs just grow nails faster.
- Nail color and thickness: Thick, dark nails can look and behave differently from thin, light ones.
- Diet and health: Poor nutrition or illness can affect nail growth and quality.
Front vs. Back Nails
Front nails usually grow faster and need more frequent trims than back nails.
Little and Often Beats Big and Rare
Trimming a tiny bit every couple of weeks is far easier, safer, and less stressful than a big overhaul every three months. Regular trims also help the quick recede.
Reading Your Dog
Rather than relying only on the calendar, use the click test and the standing check. If nails touch the floor or click loudly, it is time.
Seasonal Changes
In winter, when dogs walk less, nails may need more attention. In summer, with more walks on pavement, they may wear down more.
Keep a Log
Write the date of each trim in your phone or on a calendar. It helps you stay on schedule.
Types of Dog Nail Trimmers
There are several tools. Each works a little differently, and the best one depends on your dog and your comfort.
| Type | How it works | Best for | Main drawback |
| Scissor-style (plier) clippers | Two blades close like scissors around the nail | Most dogs; small to large | Can crush a nail if dull |
| Guillotine clippers | A hole to slide the nail through; a blade slices across | Small and medium dogs with thin nails | Can crush; blade needs replacing |
| Nail grinder | A spinning abrasive bit files the nail down | Black nails, nervous owners, thick nails | Noise and vibration; learning curve |
| Nail file or board | Manual filing | Light touch-ups, scratch boards | Slow for long nails |
| Combination or sensor tools | Clippers with guards or lights | Beginners | May cost more |
Which Is Best?
There is no single winner. Many owners use a clipper for the bulk trim and a grinder or file to smooth edges. Others swear by a grinder alone. Choose what suits you and your dog.
The Most Important Rule
Whatever you choose, make sure it is sharp, clean, and the right size.
Browse nail clippers, grinders, and grooming tools at Pet Supply Go.
Scissor-Style and Plier-Style Clippers
These are the most popular choice, and for good reason.
What They Look Like
Two handles, like scissors or pliers, with a pair of curved blades at the end. The nail sits between the blades, and squeezing the handles closes them.
How They Work
You place the blades around the nail, perpendicular to the nail’s length, and squeeze. The blades cut cleanly through the nail.
Pros
- Strong, clean cuts
- Good control and visibility
- Available in sizes for tiny to giant dogs
- Good for thick nails
- Easy to see where you are cutting
- Many have safety guards or locks
- Durable and reusable
Cons
- Require some hand strength, especially for big dogs
- Dull blades crush nails and cause pain
- May feel awkward at first
- Bulky for tiny paws if too large
Who They Suit
- Most dogs of all sizes
- Owners who want visibility and control
- Dogs with thick or hard nails (choose heavy-duty versions)
What to Look For
- Sharp stainless steel blades
- A comfortable, non-slip handle
- A safety lock
- An appropriate size
- A nail guard (optional) to prevent over-trimming
Tips
- Hold the clipper so the blades are at a right angle to the nail.
- Cut in small snips, a little at a time.
- Replace or sharpen blades when they dull.
Guillotine Clippers
Guillotine clippers have a small hole that the nail slides through, and a blade that slices across when you squeeze the handle.
How They Work
You slide the nail through the hole, line up the blade at the point you want to cut, and squeeze. The blade slices through.
Pros
- Quick and simple
- Good for small and medium dogs with thin nails
- Compact and lightweight
Cons
- The blade can dull and crush instead of cut
- The nail must fit the hole, so thick nails may not fit
- Less visibility of the cut
- Blades need replacing
- Not ideal for thick or hard nails
- The nail can be pushed upward by the blade if it is dull, which hurts
Who They Suit
- Small and medium dogs with thin to average nails
- Owners comfortable with the mechanism
Who Should Skip Them
- Dogs with thick or very hard nails
- Beginners who want clear visibility of the cut
Tips
- Always point the cutting blade toward the end of the nail, not toward the paw.
- Replace blades regularly.
- Make sure the nail sits fully in the hole before squeezing.
Nail Grinders
A nail grinder, often a handheld rotary tool, wears the nail down with a spinning abrasive bit.
How They Work
A small motor spins a sanding or grinding bit. You touch the bit to the nail in short passes, gradually shortening and smoothing it.
Pros
- Smooth, rounded edges with no sharp points
- Gradual removal, so it is easier to avoid the quick
- Helpful for black nails, because you can remove tiny amounts
- Good for thick or hard nails
- Great for finishing after clipping
- No crushing or splintering
Cons
- Noise and vibration, which scare some dogs
- Takes longer than clipping
- Heat and friction can build up if you hold the bit on one spot
- Long fur can catch in the bit
- Battery or charging needed
- A learning curve to hold steady
Who They Suit
- Dogs with black or thick nails
- Owners afraid of cutting the quick
- Dogs who do not mind the sound, or can learn to tolerate it
- Anyone wanting a smoother finish
Who Should Be Careful
- Very noise-sensitive dogs
- Dogs with a lot of paw fur, unless you hold it back
- Dogs who will not hold still
What to Look For
- Variable speed: Lets you choose a lower speed for nervous dogs.
- Low noise and vibration: Often labeled as “quiet.”
- A guard around the bit, to protect fur and skin.
- Several bit sizes for different nail sizes.
- Good battery life or a reliable cord.
- Comfortable grip.
- Replaceable grinding bits.
Using a Grinder Safely
- Use short, one- to two-second touches.
- Move the bit across the nail, not in one spot.
- Keep the grinder moving to avoid heat.
- Keep fur, skin, and the pad away from the bit.
- Pause often and let the nail cool.
- Reward calm behavior.
Introduce It Slowly
Many dogs fear the sound and sensation at first. Introduce the grinder gradually, as in the desensitization plan below.
Nail Files, Boards, and Natural Wear
Not every trim has to be done with a tool in hand.
Nail Files
A coarse file or emery board can smooth rough edges or take off tiny amounts. It is slow but very gentle, and some owners use it for finishing.
Scratch Boards
A scratch board is a flat board covered with sandpaper or an abrasive surface. Dogs are taught to scratch their paws against it, wearing their own nails down. It takes training, but some dogs love it.
How to train it:
- Place treats on the board to build positive associations.
- Reward any paw contact.
- Click or mark when your dog scratches the board.
- Gradually reward more scratching.
- Add a cue like “scratch.”
Natural Wear
Walking on pavement and rough surfaces wears nails down. It helps, but it rarely does the whole job. Most dogs still need trims.
Digging
Some dogs wear their nails by digging. Provide a sandbox if you want to encourage it.
Why Not Rely on It Alone
Natural wear is uneven, does not affect dewclaws, and does not usually keep nails at the right length for dogs who live in homes with soft floors.
How to Choose the Best Dog Nail Clippers
With so many options, here is a simple decision process.
Step 1: Consider Your Dog’s Size and Nails
- Tiny dogs: small scissor-style clippers, small guillotine clippers, or a grinder with a small bit.
- Small to medium dogs: scissor-style clippers or guillotine clippers in a medium size.
- Large dogs: large scissor-style or plier-style clippers designed for thick nails.
- Giant dogs: heavy-duty plier-style clippers or a strong grinder.
Step 2: Consider Nail Color
- Clear or light nails: any type works, since you can see the quick.
- Dark or black nails: many owners prefer a grinder, or small-snip clipping with a guard.
Step 3: Consider Your Hands
- Weak grip, arthritis, or small hands: a grinder may be easier, or clippers with a spring-assisted, ergonomic handle.
- Strong grip: most clippers work well.
Step 4: Consider Your Dog’s Temperament
- Calm dogs: any tool.
- Noise-sensitive dogs: clippers.
- Dogs who hate pressure on the nail: grinder or file.
- Wiggly dogs: a quick tool like clippers can be easier, or a quiet grinder with a helper.
Step 5: Consider Your Confidence
- Nervous beginner: a grinder or clippers with a safety guard.
- Experienced: whatever you like.
Step 6: Decide on Budget
Good tools do not have to be expensive, but very cheap clippers often dull quickly. Look for stainless steel and solid construction.
A Starter Setup
Many owners keep a pair of well-sized clippers plus a quiet grinder or file. They clip first, then smooth.
Check Reviews and Specs
Look for comments about sharpness, comfort, noise, and durability, and see whether the product matches your dog’s size.
Sizing: Small, Medium, Large, and Giant Dogs
Size is the most common reason clippers fail.
Why Size Matters
- Too small for the dog: The blades struggle with thick nails, crush instead of cut, and can splinter nails.
- Too large for the dog: Hard to control, and you may cut too much at once.
General Size Guide
Brands label sizes differently, but a common pattern is:
- Small or mini: for toy breeds and puppies, with nails that are thin and narrow.
- Medium: for dogs roughly 20 to 50 pounds.
- Large: for dogs roughly 50 to 90 pounds.
- Extra large or giant: for dogs over 90 pounds, or for very thick nails.
Always check the manufacturer’s recommended nail thickness and dog weight range.
Nail Thickness Matters More Than Weight
A heavy dog with thin nails may do fine with a medium clipper, while a mid-sized dog with very thick nails may need a heavy-duty one.
Test the Fit
The nail should sit comfortably between the blades without being squeezed or forced. If you must press hard, the clipper is too small.
Multiple Dogs
If you have dogs of very different sizes, you may need more than one tool.
Grinder Bit Sizes
Choose a bit that matches your dog’s nail width. A small bit for tiny nails and a larger one for thick nails.
Features Worth Paying For
Not every feature matters, but a few make a real difference.
Stainless Steel Blades
Strong, sharp, and long-lasting. They hold an edge and resist rust.
Safety Guard or Stop
A guard on the clipper limits how much nail you can cut at once. It does not guarantee you will not nick the quick, but it helps beginners.
Safety Lock
Keeps the clipper closed when stored, protecting the blades and you.
Non-Slip, Ergonomic Handles
Soft grips reduce hand fatigue and keep the tool steady, even if your hands get sweaty.
Spring-Loaded Handles
Help the clipper open again after each cut, reducing effort.
LED Light or Sensor (on Some Models)
Some tools light up the nail to help you see the quick, or claim to sense it. They can help with light nails, but they are not perfect. Do not rely on them alone.
Replaceable Blades
Useful for guillotine styles.
Built-in Nail File
A small file attached to the clipper is handy for smoothing edges.
Quiet Motor and Variable Speed (Grinders)
Low noise and adjustable speeds reduce stress.
Dust Collection (Grinders)
Some grinders collect nail dust, which keeps the mess down. Others do not, so wear a mask in poorly ventilated spaces if you are sensitive.
Rechargeable Battery
A reliable battery makes a grinder more convenient. Check run time.
What You Do Not Need
Fancy extras are fine, but nothing replaces sharpness, the right size, and a calm approach.
Blade Care and When to Replace
Sharp tools are safer tools.
Signs of Dull Blades
- The nail seems to crush or squeeze before it cuts
- Nails splinter or crack
- You need to press hard
- Your dog pulls away or yelps more than usual
How to Maintain Clippers
- Wipe blades clean after each use.
- Dry them to prevent rust.
- Oil the pivot occasionally, according to the instructions.
- Store them in a dry place with the lock on.
- Keep them away from moisture.
Sharpening
Some clippers can be sharpened professionally, but many are inexpensive enough to replace.
When to Replace
- After a year or so of regular use, or sooner if dull
- If the blades are chipped, bent, or rusty
- If the pivot is loose or the handle is damaged
Replace Grinder Bits
Grinding bits wear out and clog. Replace them when they stop removing nail efficiently.
Keep Tools Clean
Clean tools reduce the chance of spreading bacteria. Wipe them with a pet-safe disinfectant if needed.
Everything You Need Before You Start
Gather your supplies before you pick up your dog’s paw.
Essentials
- Nail clippers or a grinder that fit your dog
- Styptic powder (or cornstarch as a backup) to stop bleeding
- Treats: small, soft, and high-value. Our guide to freeze-dried dog treats explains how to choose safe options.
- A towel or non-slip mat
- Good lighting: a bright lamp or a window
- A headlamp or flashlight: helps with black nails
Helpful Extras
- A lick mat: spread with something tasty to keep your dog busy. See our guide to lick mats for dogs.
- A helper: someone to hold treats and steady your dog
- A nail file to smooth edges
- Paper towels and gauze
- A clean cloth for wiping
- A muzzle, if your dog has a bite history (see the section on fear and aggression)
Keep Styptic Powder Close
Open the container and have it ready before you begin. Nicks happen quickly.
Choose the Right Time
Pick a calm moment, such as after a walk or play session, when your dog is relaxed. Avoid trimming when you are in a rush or your dog is wound up.
Setting Up and Positioning Your Dog
Where and how you position your dog affects how safe and comfortable the trim is.
Choose a Spot
- A quiet room with good light
- A non-slip surface
- Somewhere you can sit or kneel comfortably
Positions
On the floor: Many dogs feel more secure on the floor. Sit beside or behind your dog, with their paw resting in your hand.
On your lap: Works for small dogs. Support their body against you.
On a grooming table: Helps with larger dogs, as long as it has a non-slip surface and your dog is secured safely. Never leave a dog alone on a table.
Standing: Some dogs do best standing, with you crouched next to them.
Lying on their side: Useful for dogs who tolerate it, especially for back paws.
Holding the Paw
- Support the leg gently, do not squeeze.
- Hold the paw in your non-dominant hand, with your thumb on the pad and your forefinger above the nail.
- Gently push the toe pad back to extend the nail.
- Keep the leg in a natural position, not bent too far or pulled out to the side.
Hold Steady, Not Tight
Your hold should be firm enough to keep the paw still, but gentle enough not to scare your dog.
Keep Your Dog Comfortable
- Talk calmly.
- Give treats before, during, and after.
- Take breaks.
- Stop if your dog is very stressed.
Using a Helper
A second person can offer treats, hold the lick mat, and steady your dog. They should not restrain your dog forcibly.
Safety First
If your dog growls, snaps, or panics, stop. Forcing the issue can lead to bites and make fear worse. See the section on dogs who hate nail trims.
How to Trim Dog Nails With Clippers, Step by Step
Here is the full process.
Step 1: Prepare
Gather your supplies. Make sure the clipper is sharp and the right size. Open the styptic powder.
Step 2: Get Your Dog Comfortable
Let your dog sniff the clippers. Give a treat. Touch the clippers to a paw without cutting, and treat again.
Step 3: Hold the Paw
Hold the paw gently, thumb on the pad and forefinger on top of the toe. Gently push the pad back to expose the nail.
Step 4: Find the Quick
On light nails, look for the pink area inside. Plan to cut about two millimeters (around a tenth of an inch) before it. On dark nails, see the section below.
Step 5: Position the Clipper
Hold the clipper at a right angle to the nail, with the cutting blade toward the end. For most dogs, you want to cut the nail at a slight angle, following the nail’s natural shape, so that the cut surface is close to flat with the ground when your dog stands.
Step 6: Make a Small Cut
Squeeze the clipper in one smooth motion. Trim only a small piece, no more than a few millimeters at a time.
Step 7: Check the Cut Surface
Look at the end of the nail. On light nails, stop when you see the quick as a slight pink. On dark nails, stop when you see a small dark or gray dot at the center, which signals the quick is near.
Step 8: Treat and Praise
Give a treat after each nail, or after a few nails, depending on your dog’s comfort.
Step 9: Repeat
Move to the next nail. Work in the same order each time, so your dog knows what to expect.
Step 10: Smooth the Edges
If a nail has a sharp edge, smooth it with a file or grinder.
Step 11: Finish With a Reward
Give a jackpot of treats or a favorite game when you finish. End on a positive note.
If Your Dog Gets Stressed
Stop after a few nails. Come back later. Short sessions are better than a stressful marathon.
Doing Only Some Nails
It is fine to trim a few nails at a time. Many dogs do better with one paw a day.
Tips
- Cut with confidence. Hesitating can make the clipper squeeze the nail.
- Keep your fingers away from the blades.
- Work in good light.
- Take your time.
How to Use a Nail Grinder, Step by Step
Grinders are gentle once your dog accepts them.
Step 1: Prepare
Charge or plug in the grinder. Choose a bit that suits your dog’s nails. Have treats and a towel ready.
Step 2: Introduce the Grinder
Turn it on at a distance. Give treats. Gradually move it closer over days, without touching your dog, if your dog is nervous.
Step 3: Touch the Paw
Hold the paw gently. Touch the grinder, turned off, to a nail. Treat.
Step 4: Start Grinding
Turn the grinder on, and touch the bit to the nail for one to two seconds. Move the bit across the nail end. Stop and treat.
Step 5: Work in Small Passes
Grind a little at a time, from the tip. Alternate between nails, so no single nail gets hot.
Step 6: Watch the Nail
On light nails, stop when you see the quick as a pink area. On dark nails, stop when you see the dot or ring pattern.
Step 7: Round the Edges
Use the grinder to round the nail so it is smooth and not sharp.
Step 8: Mind the Fur
Hold long paw fur back so it does not catch in the bit.
Step 9: Reward
Treat after every nail or two. Keep it fun.
Safety Tips
- Keep sessions short.
- Avoid pressing hard, which creates heat.
- Do not hold the bit on one spot.
- Never grind near the pad or skin.
- Stop if your dog seems stressed, and take a break.
- Wear a mask if you are sensitive to dust.
Use With Clippers
Many owners clip the bulk of the nail with clippers, then use the grinder for finishing.
Trimming Light Nails
Light or clear nails are the easiest to trim because you can see the quick.
How to See the Quick
Hold the nail up to the light. The quick appears as a pink or reddish area inside the nail, which is the blood supply. The nail beyond the quick looks white or translucent.
Where to Cut
Cut about two millimeters, or a tenth of an inch, beyond the end of the quick. This leaves a safety margin.
Step by Step
- Hold the paw and extend the nail.
- Locate the quick.
- Place the clipper beyond the quick.
- Cut in one small snip.
- Check the end. If you see only white, you can trim a little more.
- Stop before you reach pink.
Trim Gradually
If the nail is long and the quick has grown long, trim a small bit every few days until the quick recedes. Do not cut it all at once.
Check Each Nail
Quick length varies from nail to nail, so check each one.
Trimming Black Nails
Black or dark nails are harder because you cannot see the quick. Patience is the key.
The Main Rule
Take tiny slices, and check the cut surface after each one.
What to Look For on the Cut Surface
As you trim, look at the cut end of the nail.
- Chalky white: you are in the dead part of the nail. It is safe to keep trimming.
- A dark or gray oval or dot in the center: this is the beginning of the quick. Stop here.
- Pinkish tissue: you are in the quick. Stop immediately.
Step by Step
- Hold the paw and extend the nail.
- Cut a very thin slice, about one to two millimeters.
- Look at the cut surface.
- If it is all white or chalky, cut another thin slice.
- When you see a dark dot or gray center, stop.
- Move to the next nail.
Use Light
A bright flashlight shone from behind or the side may help you see the shape of the nail and sometimes the quick.
Use a Grinder
A grinder removes tiny amounts and lets you stop when you see the dark center. Many owners find it easier for black nails.
Look at the Underside
On many nails, the underside has a groove where the nail splits open. The hollow area begins where the quick ends. It is a helpful guide.
Trim Often
Regular small trims help the quick recede, making it easier to keep nails short over time.
Be Patient
It is better to trim too little than too much. You can always do another small trim in a few days.
Dewclaws
Dewclaws are the often-forgotten nails.
What They Are
Small nails higher up on the leg. Most dogs have them on the front legs. Some have them on the back legs, too. Some have double dewclaws.
Why They Need Attention
Because they do not touch the ground, they never wear down. If not trimmed, they can grow in a curve and pierce the skin of the leg, causing pain and infection.
How to Trim
- Locate the dewclaw. It is usually on the inside of the leg, a few inches above the paw.
- Hold it gently.
- Trim small bits, as with other nails.
- Check for the quick, as with other nails.
Dewclaw Quick
The quick in dewclaws is usually similar to other nails. Follow the same rules.
Check Regularly
Look at the dewclaws every week. They are the nails most likely to be forgotten and overgrown.
Loose Dewclaws
Some dogs, especially on the back legs, have dewclaws attached loosely by skin. These can snag and tear. Talk to your vet if yours seem loose.
Removed Dewclaws
Some dogs have had them removed. Check with your vet or breeder if you are unsure.
Nail Trimming for Puppies
Start early, and puppies will grow up accepting it.
Why Start Young
Puppies are more adaptable. Handling their paws and trimming their nails from the start builds a lifelong habit. Puppy nails are also sharp, and trimming helps protect your skin, furniture, and clothing.
Begin With Handling
From the first days home, touch your puppy’s paws and toes daily, and pair each touch with a treat. Gently press each toe pad, hold a paw, and tap the nails.
First Trims
- Use small, sharp clippers designed for puppies or toy breeds, or a small grinder.
- Trim just the very tip of each nail.
- Do one or two nails at a time.
- Keep sessions short and positive.
Frequency
Puppy nails grow fast. Plan on a light trim every one to two weeks at first.
Make It Fun
Use a lick mat, treats, and gentle praise. Never hold your puppy down.
Get Gear Ready
Our puppy starter kit guide lists the grooming basics for new puppy owners, so you are prepared from day one.
Wiggly Puppies
Puppies squirm. Try trimming when your puppy is sleepy, after a meal, or after play. Have a helper, or use a lap or towel to cuddle them.
Safety
Be gentle with tiny paws. Make small cuts and look carefully for the quick.
Small and Toy Breeds
Little dogs have little nails, and little problems.
What Makes It Different
- Nails are thin and delicate.
- Toes are tiny, making it hard to hold steady.
- The quick is often closer to the tip.
- Small dogs can be wiggly or nervous.
Tools
- Small scissor-style clippers or small guillotine clippers
- A grinder with a small bit and low speed
- A fine nail file
Tips
- Hold the paw on your lap, with your dog supported.
- Trim tiny amounts.
- Take your time.
- Use treats and a lick mat.
- Many small dogs have long, thin hair between the toes. Hold it back before trimming.
Frequency
Small dogs are often less active and walk on soft surfaces, so nails can grow long. A regular schedule of every three to four weeks is common.
Be Gentle
Small dogs are easily bruised and hurt. Hold their legs gently, and never force a position.
Large and Giant Breeds
Big dogs bring big nails and big challenges.
What Makes It Different
- Nails are thick, hard, and strong.
- Dogs are heavy, and can be hard to hold.
- Some large dogs are nervous or have bad past experiences.
- Hand strength matters.
Tools
- Heavy-duty scissor-style or plier-style clippers
- A powerful, quiet grinder
- A non-slip mat
Tips
- Have your dog lie down on their side, or stand beside you.
- Use a helper to offer treats.
- Take breaks.
- Make small, firm cuts.
- Use a grinder for finishing.
- Reward heavily.
Take Care of Your Back
Kneel or sit comfortably. Avoid hunching over a standing dog for long.
Comfort for Large Dogs
After a trim, a comfortable resting place helps. See our guide to supportive large dog beds.
Strong Dogs Who Pull Away
Do short sessions, use treats, and consider professional help if your dog is too strong to handle safely.
Senior Dogs and Dogs With Arthritis
Older dogs need gentle handling.
Why Nails Need Extra Attention
- Seniors are often less active, so nails wear down less.
- Long nails make walking and standing harder.
- Arthritis can make lifting and holding paws painful.
- Nails may become thick, brittle, or crumbly.
Make It Comfortable
- Let your dog lie down on a soft surface.
- Support the leg and do not twist it.
- Work slowly and take breaks.
- Use short sessions.
- Do one or two nails at a time.
Tools
- A quiet grinder can be easier on sore joints than the pressure of clippers.
- Sharp clippers for brittle nails, with gentle snips.
Watch for Pain
If your dog flinches, cries, or pulls away, stop. Pain in the legs or joints can make nail trims hard. Talk to your vet about pain relief and joint support.
Mobility Tips
Short nails improve grip and balance. Combine nail care with non-slip rugs, ramps, and a supportive bed.
Brittle Nails
Older nails can crack and split easily. Trim carefully, and see your vet if nails look unhealthy.
Dogs Who Hate Nail Trims
Many dogs dislike nail trims, and for good reason. Paws are sensitive, and being restrained is stressful.
Why Dogs Fear Nail Trims
- A past bad experience, like being cut too short
- Being held down
- The sound or feeling of the tool
- Sensitivity to paw handling
- Pain in the paw or leg
- Lack of early handling
Signs of Fear or Stress
- Pulling the paw away
- Freezing or stiffening
- Panting, lip licking, or yawning
- Trembling
- Trying to escape
- Whining or barking
- Growling, snapping, or biting
What Not to Do
- Do not hold your dog down.
- Do not scold or punish.
- Do not rush through the trim while your dog panics.
- Do not trim many nails in one stressful session.
What to Do Instead
- Go slowly with desensitization and counterconditioning.
- Use high-value treats.
- Make sessions short and positive.
- Break the job into tiny steps.
- Let your dog set the pace.
Check for Pain
If your dog suddenly dislikes paw handling, a sore nail, joint, or pad could be the cause. See your vet.
Aggression
If your dog growls, snaps, or bites, stop, and talk to your vet or a certified trainer. A muzzle introduced positively can make trims safer, but should be used with guidance. For dogs with serious fear or aggression, a professional groomer or vet may be the best choice.
Sedation
Do not attempt to sedate your dog at home. If your dog needs sedation for trims, ask your vet.
A Desensitization Plan for Nervous Dogs
This gradual plan builds comfort step by step. Go at your dog’s pace. Some dogs take days, and some take weeks.
Stage 1: Paw Touching
- Sit with your dog and treats.
- Touch a paw for one second, and treat.
- Touch each paw, and treat.
- Hold a paw for a few seconds, and treat.
- Press each toe gently, and treat.
Stage 2: The Tool Appears
- Place the clippers or grinder on the floor near your dog. Treat.
- Pick it up and show it. Treat.
- Touch the tool to your dog’s shoulder, then leg, then paw. Treat each time.
Stage 3: Tool and Nail Contact
- Touch the clippers to a nail without squeezing. Treat.
- Squeeze the clipper without a nail inside, so your dog hears the sound. Treat.
- For grinders, turn it on at a distance, then closer, then touch the paw lightly. Treat.
Stage 4: The First Nail
- Hold the paw and clip just the tip of one nail.
- Treat and praise.
- Stop. End on a win.
Stage 5: Building Up
- Trim one nail a day, then two, then a full paw.
- Add more as your dog stays calm.
- Keep rewards high.
Tips
- Keep each step short.
- If your dog shows stress, go back a step.
- Use a lick mat for distraction. Our guide to lick mats for dogs explains how.
- Train when your dog is calm and relaxed.
- Be patient.
The Goal
You want your dog to think, “Paw handling means treats,” not “Here comes something scary.”
Consider Professional Help
If you are not making progress, a certified trainer can help.
What to Do If You Cut the Quick
It happens to almost everyone. Stay calm.
What You Will See
Bleeding from the nail, sometimes quite a lot. Your dog may yelp or pull away. The blood looks dramatic but is usually not dangerous.
Step by Step
- Stay calm. Your dog will pick up on your stress.
- Comfort your dog. Speak softly and give a treat if they will take one.
- Apply styptic powder to the bleeding tip. Press the nail into the powder, or apply with a clean cloth or cotton swab.
- Hold gentle pressure for a minute or two.
- If you do not have styptic powder, use cornstarch, flour, or baking soda, and press it onto the nail.
- Check the bleeding. It should slow or stop within a few minutes.
- Keep your dog calm and quiet for the next half hour. Avoid running or digging.
- Keep the nail clean and dry. Do not let your dog lick it.
- Wipe up any blood.
Do Not
- Do not use human products with strong chemicals.
- Do not apply tight bandages around the paw.
- Do not skip the rest of the trim without comforting your dog. Offer treats and end on a positive note.
Hydrogen Peroxide?
Some owners use it, but it is not recommended for routine care because it can irritate tissue. Ask your vet.
When to Call the Vet
- Bleeding continues beyond about ten to fifteen minutes
- The nail is torn, broken, or hanging
- The paw is swollen or red
- Your dog is limping badly
- You see pus or other signs of infection in the following days
- Your dog has a bleeding disorder or is on blood-thinning medication
Afterward
A quick may look sore for a day or two. Watch for licking, limping, or redness. Reassure your dog, and plan a gentler next trim.
Learn From It
Cutting the quick does not mean you failed. It teaches you where the quick is. Next time, trim smaller bits and watch the cut surface.
Nail and Paw Problems to Watch For
While trimming, look for signs of trouble.
Torn or Split Nails
Painful, often bleeding. May need a vet to trim and treat safely.
Ingrown Nails
Nails that curl into the pad. They cause pain, swelling, and infection. See your vet.
Cracked or Brittle Nails
May be caused by dry conditions, poor diet, age, or illness. If nails keep cracking, mention it to your vet.
Discolored Nails
Color changes can be normal, but sudden changes in color, shape, or texture deserve a vet check.
Infections
Signs include redness, swelling, pus, odor, and licking. Fungal and bacterial infections can affect the nail bed. Call your vet.
Lumps or Growths
Any new lump on or near the nail should be checked.
Loss of Nails
Nails can fall off from injury, infection, or immune problems. See your vet if multiple nails are lost.
Pain in Paws
Limping, licking, chewing, or reluctance to walk can have many causes. Check the paw, and call your vet if you cannot find the cause.
Interdigital Problems
Redness, cysts, and irritation between the toes can come from allergies, infections, or trapped debris. Keep the area clean and dry, and ask your vet.
Paw Care Routine
Nail trims fit into a bigger picture of paw care.
Weekly Paw Check
- Look at the pads for cuts, cracks, and burns.
- Spread the toes and check between them.
- Look at nails for cracks or splits.
- Check dewclaws.
- Look for burrs, thorns, and debris.
- Feel for lumps or tenderness.
Keep Paws Clean
After muddy, wet, or salty walks, wipe or rinse paws. Our guide to cleaning dog paws covers fast, safe methods.
Trim Paw Fur
Long fur between the pads traps dirt and moisture. Trim it with rounded-tip scissors or small clippers, or ask a groomer.
Moisturize When Needed
Dry, cracked pads may benefit from a dog-safe paw balm. Avoid products with essential oils or ingredients that are unsafe if licked.
Protect in Extreme Weather
- Winter: Salt and ice can irritate pads. Rinse and dry paws after walks. A fitted coat helps small dogs stay warm. See our guides to dog winter coats and whether dogs need sweaters.
- Summer: Hot pavement burns pads. Use the five-second hand test.
Brush and Groom Regularly
A regular grooming routine, including brushing, makes paw care easier. Our guide to reducing dog shedding has grooming tips that fit well alongside nail care.
Combine Tasks
Trim nails, check paws, and clean the coat in one calm grooming session, with treats throughout.
Walking Surfaces and Natural Wear
What your dog walks on affects their nails.
Hard Surfaces
Concrete and asphalt wear nails down naturally. Dogs who walk on pavement every day may need fewer trims, but they still need them.
Soft Surfaces
Grass, dirt, sand, and carpet do not file nails. Dogs who walk mostly on soft ground often have long nails.
Hardwood and Tile Floors
Nails click on hard floors, which makes it easy to hear when they are too long.
Exercise Matters
Active dogs wear their nails more. Seniors and indoor dogs may wear them less.
Be Careful With Abrasive Surfaces
Hot pavement and rough surfaces can wear nails but also hurt pads. Walk smartly.
Do Not Rely on Walks Alone
Even dogs on pavement still need trims, especially on dewclaws and back feet.
Combine Approaches
Walks, scratch boards, regular trims, and a grinder give the best results.
Professional Trims: Groomers and Vets
You do not have to do it all yourself.
Why Use a Professional
- Your dog is very fearful or aggressive.
- Your dog’s nails are severely overgrown.
- You are not comfortable trimming.
- Your dog has medical issues.
- You want a quick, expert job.
Who Can Help
- Groomers: often offer nail-only appointments.
- Veterinary clinics: may offer nail trims, often with vet techs.
- Mobile groomers: come to your home.
- Self-service dog wash shops: some offer nail trims.
What to Expect
- A short appointment, often a few minutes
- A modest fee
- Possible use of clippers or a grinder
- Some places use a gentle restraint, such as a towel or a helper
Choosing a Groomer
- Ask about their approach to nervous dogs.
- Look for patient, gentle handling.
- Ask whether they use force or muzzles.
- Visit the shop first, if you can.
- Share your dog’s history and fears.
Tell Them What You Want
Ask for a gentle approach, treats, and breaks if needed.
Learn From Them
Ask a groomer or vet tech to show you how to trim your dog’s nails. Watching a pro is a great way to learn.
Regular Visits
If you use a professional, schedule regular appointments, about every three to four weeks, so nails never get too long.
Cleaning and Storing Your Tools
Care for your tools so they last.
After Each Use
- Wipe away nail dust and debris.
- Wipe blades with a clean cloth.
- Dry thoroughly.
Disinfecting
Wipe with a pet-safe disinfectant, especially if you trimmed an infected or bleeding nail.
Storage
- Keep clippers closed, with the lock on.
- Store in a dry place, away from moisture.
- Keep tools out of reach of children and pets.
- Store grinders with the bit removed or covered.
Grinder Care
- Remove nail dust from the vents.
- Replace worn bits.
- Charge batteries according to instructions.
Styptic Powder Storage
Keep the container closed and dry. Replace it if it clumps or expires.
Common Mistakes
- Using dull clippers. They crush nails and hurt.
- Using the wrong size. Too small, and they crush. Too big, and they are hard to control.
- Cutting too much at once. Small snips are safer.
- Not having styptic powder ready.
- Rushing. Stress leads to mistakes.
- Holding the paw too tightly. It scares dogs.
- Forgetting dewclaws.
- Trimming in poor light. You cannot see the quick.
- Ignoring the cut surface on black nails.
- Skipping treats. Rewards make the experience positive.
- Forcing a frightened dog.
- Doing everything in one session. Spread it out.
- Waiting too long between trims. Quicks grow long.
- Overheating the nail with a grinder.
- Letting long fur tangle in the grinder.
- Not checking paws for other problems.
- Giving up after one bad experience.
- Using human nail clippers. They are too small and weak.
Troubleshooting Common Problems
My dog pulls their paw away.
Hold the paw gently but securely, use treats, and go slowly. Practice paw handling daily without trimming. Try a different position.
My dog squirms and will not hold still.
Use a lick mat, a helper, and short sessions. Trim after exercise, when your dog is tired.
My dog bites or growls.
Stop. Do not force it. Talk to your vet or a certified trainer, and consider professional trims.
The nail splinters when I cut it.
Your clippers may be dull or the wrong size. Replace or upgrade them, and cut in smaller snips.
I can not see the quick on black nails.
Trim tiny slices, check the cut surface for the dark dot, or use a grinder. A bright light may help.
I nicked the quick.
Apply styptic powder, stay calm, and reassure your dog. See the section above.
My dog’s nails are very long and the quick is long, too.
Trim a tiny bit every few days, so the quick recedes. Do not cut it all at once.
My dog hates the grinder noise.
Introduce it slowly, from a distance, with treats. Try a quieter model, or switch to clippers or a file.
My dog’s nails grow back quickly.
Some dogs grow nails fast. Trim more often, in smaller amounts.
My dog’s nails are too hard to cut.
Use heavy-duty clippers or a grinder. A warm bath beforehand can soften nails slightly. Make sure the clippers are sharp.
My dog’s nails keep cracking.
Cracked nails can be due to dryness, age, or underlying problems. See your vet.
My dog limps after a trim.
You may have cut too short or hit the quick. Check the nail, rest your dog, and call your vet if limping lasts.
I am afraid of hurting my dog.
Start with a grinder or a file, trim tiny amounts, or ask a groomer to teach you. Confidence grows with practice.
My dog’s dewclaw is overgrown.
Trim it carefully, and see your vet if it has grown into the skin.
My puppy bites the clippers.
Use a lick mat or chew, and let your puppy investigate the clippers with treats. Keep sessions short.
When to Call a Vet
Call Your Vet If
- Bleeding does not stop after ten to fifteen minutes
- A nail is torn, broken, or hanging
- A nail has grown into the pad
- A nail or toe is swollen, red, or has pus
- Your dog limps for more than a day
- Nails are discolored, crumbling, or falling out
- You see lumps or sores near the nails
- Your dog is in pain when you touch their paws
- Your dog is extremely fearful or aggressive about trims
- Your dog has a bleeding disorder or takes blood thinners
Questions to Ask Your Vet
- Are my dog’s nails healthy?
- How often should I trim them?
- What tool do you recommend?
- Can you show me how to trim safely?
- Could joint or health issues be affecting how my dog walks?
- Is sedation appropriate for my dog?
Bring
- Your tools, so the vet can advise on fit
- Notes on trim dates and any problems
- Photos of problem nails
A 4-Week Nail Trim Training Plan
Use this to build comfort and a routine. Adjust the pace to your dog.
Week 1: Paw Handling
- Touch each paw daily and treat.
- Hold paws for a few seconds, and treat.
- Press each toe gently, and treat.
- Introduce the nail clippers or grinder at a distance, and treat.
- Keep sessions to two minutes.
Week 2: Tool Introduction
- Let your dog sniff and touch the tool.
- Touch the tool to each paw, with treats.
- Squeeze the clippers or turn on the grinder at a distance.
- Trim the very tip of one nail, if your dog is calm.
- End with a jackpot.
Week 3: Building Up
- Trim one to two nails per session.
- Try a lick mat for distraction.
- Include a front and a back paw.
- Check dewclaws.
- Note the date of each trim.
Week 4: Full Trim
- Trim all nails over a few short sessions, or in one session if your dog is calm.
- File or grind sharp edges.
- Reward generously.
- Plan your next trim for about three to four weeks away.
- Review what worked, and adjust.
After Week 4
Keep a regular schedule. Trim little and often, and keep rewarding. Over time, nails will stay short, and the quick will recede.
Shopping Checklist
Trimming Tools
- Sharp, appropriately sized nail clippers (scissor-style or plier-style for most dogs)
- Quiet, variable-speed nail grinder with a guard (optional but helpful)
- Fine nail file
- Rounded-tip grooming scissors or small clippers for paw fur
Safety and First Aid
- Styptic powder
- Cornstarch (backup)
- Gauze and paper towels
- Flashlight or headlamp
Training and Comfort
- Soft, tiny, single-ingredient treats
- Lick mat
- Non-slip mat or towel
- Comfortable resting bed for after the trim
Paw Care
- Dog-safe paw balm
- Paw wipes and a towel for muddy or salty days
- Coat or sweater for cold weather, if needed
Records
- Calendar or app to track trim dates
Find nail clippers, grinders, grooming tools, treats, and lick mats at Pet Supply Go.
Final Thoughts
Trimming your dog’s nails is one of those small jobs that makes a big difference. Short nails protect joints, improve grip, prevent painful tears, and keep your dog moving comfortably. They also keep your floors, furniture, and skin in better shape.
The keys are simple. Choose a sharp, appropriately sized tool. Keep styptic powder nearby. Trim a little at a time, and stop before the quick. Use treats and patience, especially with nervous dogs. Check dewclaws. Keep a regular schedule, so each trim is small and easy.
If you nick the quick, stay calm. It happens to everyone, and it is easy to manage. If your dog is very scared or aggressive, there is no shame in asking a groomer or vet for help. The goal is a healthy, comfortable dog and a calm experience for both of you.
With a little practice, nail trims can become a quiet, bonding routine, a few minutes of care that keep your dog walking happily on healthy paws.
30 Frequently Asked Questions About Dog Nail Clippers and Nail Trimming
1. What are the best dog nail clippers?
The best clippers are sharp, sized for your dog’s nails, and comfortable in your hand. Scissor-style or plier-style clippers suit most dogs, guillotine clippers suit small dogs with thin nails, and grinders are a good option for black nails and nervous owners.
2. How do I choose dog nail clippers?
Match the clipper size to your dog’s nail thickness and weight, choose sharp stainless steel blades, look for a comfortable non-slip handle and a safety lock, and consider your dog’s temperament and nail color.
3. Which is better, nail clippers or a grinder?
Neither is always better. Clippers are fast and quiet, while grinders give a smooth finish and make it easier to avoid the quick. Many owners use clippers for the bulk of the trim and a grinder to finish.
4. How often should I trim my dog’s nails?
Most dogs need a trim every three to four weeks. Active dogs who walk on pavement may need fewer trims, and indoor dogs may need more. If you hear loud clicking on hard floors, it is time.
5. How do I know if my dog’s nails are too long?
If nails click loudly on hard floors, touch the ground when your dog stands, or catch on a piece of paper slid under the paw, they are too long. Splayed toes, slipping, and limping are other signs.
6. What is the quick in a dog’s nail?
The quick is the soft core of the nail containing blood vessels and nerves. Cutting it is painful and causes bleeding. On light nails it looks pink. On dark nails it is hidden.
7. How do I cut black dog nails?
Trim very thin slices and check the cut surface after each one. Stop when you see a dark or gray dot in the center, which signals the quick is near. A grinder can make this easier.
8. What do I do if I cut the quick?
Stay calm, apply styptic powder or cornstarch with gentle pressure, and keep your dog quiet. Bleeding usually stops within minutes. Call your vet if it lasts more than about ten to fifteen minutes.
9. Does cutting the quick hurt my dog?
Yes, it can hurt briefly, and some dogs yelp. It is usually not serious, but it can make dogs fearful of nail trims. Comfort your dog, and go slowly next time.
10. How do I stop a dog’s nail from bleeding?
Press styptic powder onto the nail tip, or use cornstarch, flour, or baking soda if you do not have it. Hold gentle pressure for a minute or two. See a vet if bleeding continues.
11. How do I trim a dog’s nails if they hate it?
Go slowly with desensitization. Touch paws with treats, introduce the tool gradually, trim one nail at a time, and use a lick mat for distraction. Never force your dog, and get professional help if your dog growls or bites.
12. Can I use human nail clippers on my dog?
No. Human clippers are too small and weak for dog nails, and they can crush or splinter them. Use clippers designed for dogs.
13. How do I trim my puppy’s nails?
Start handling paws from day one, use small sharp clippers or a small grinder, trim only the tips, and reward often. Puppy nails grow fast, so plan on a light trim every one to two weeks.
14. What size dog nail clippers do I need?
Choose a size based on nail thickness and your dog’s weight. Small clippers suit toy breeds, medium suit dogs of about 20 to 50 pounds, and large or heavy-duty clippers suit bigger dogs. Check each brand’s sizing guide.
15. How do I use a dog nail grinder?
Touch the spinning bit to the nail for one to two seconds at a time, move across the nail end, and pause often to avoid heat. Hold paw fur back, and stop when you see the quick or the dark center.
16. Are nail grinders safe for dogs?
Yes, when used carefully. Keep sessions short, avoid pressing hard or holding the bit on one spot, and keep fur and skin away from the bit. Introduce the sound gradually.
17. Should I trim dewclaws?
Yes. Dewclaws do not touch the ground and do not wear down, so they can overgrow and curl into the leg. Check them weekly and trim them like other nails.
18. How short should I cut my dog’s nails?
Short enough that they do not touch the ground when your dog stands and do not click on hard floors, but not so short that you reach the quick. Cut small amounts and stop at the quick.
19. How do I get the quick to recede?
Trim a tiny amount every few days to once a week. Over time, the quick gradually recedes, allowing you to keep nails shorter. Do not cut it all at once.
20. Why are my dog’s nails so hard to cut?
Some dogs have thick, hard nails. Use sharp, heavy-duty clippers or a grinder, and cut small pieces. Check that your clippers are the right size and not dull.
21. How do I trim my dog’s nails if they have arthritis?
Make your dog comfortable on a soft surface, support the leg, and do one or two nails at a time. A quiet grinder can be gentler than clippers. Talk to your vet about pain relief.
22. Do dogs’ nails need trimming if they walk on pavement?
Pavement wears nails down, but usually not evenly or enough, especially dewclaws and back nails. Most dogs still need regular trims.
23. How can I make nail trims less stressful?
Start with paw handling, use high-value treats, choose a calm moment, keep sessions short, use a lick mat, and trim a few nails at a time. Never hold your dog down.
24. Should I take my dog to a groomer for nail trims?
You can. Groomers and vet clinics often offer quick nail trims, and they are a good option for fearful dogs, overgrown nails, or if you are not comfortable. Ask them to show you how.
25. What happens if I never trim my dog’s nails?
Nails can grow long and curl, causing pain, posture changes, joint strain, slipping, splitting, and ingrown nails. Long nails also make the quick grow longer, making trims harder.
26. How do I know if my dog’s nail is infected?
Look for redness, swelling, pus, odor, licking, or limping. A swollen or sore toe or a nail that is loose or discolored should be checked by a vet.
27. How often should I replace dog nail clippers?
Replace them when they dull, usually after a year or so of regular use, or sooner if they crush nails, splinter them, or become rusty. Keep them clean and dry.
28. What is styptic powder and do I need it?
Styptic powder is a product that quickly stops minor bleeding, such as from a nicked quick. Keep it on hand every time you trim. Cornstarch can work in a pinch.
29. Can I trim my dog’s nails after a bath?
Yes. Nails are softer after a bath and may cut more easily. Make sure your dog is calm and dry enough to hold steady.
30. When should I see a vet about my dog’s nails?
See your vet for torn or broken nails, nails growing into the pad, signs of infection, bleeding that will not stop, crumbling or discolored nails, limping, or if your dog is too fearful or aggressive for safe trims.
This article is for general information and is not a substitute for professional veterinary advice. If your dog has bleeding that will not stop, a torn or ingrown nail, signs of infection, persistent limping, or is extremely fearful or aggressive about nail trims, contact a licensed veterinarian or a qualified grooming or behavior professional.
AFFILIATE DISCLOSURE
Petsupplygo.com is a participant in the Amazon Services LLC As an Amazon associate program, I earn from qualifying purchases.This costs you nothing extra and help us keep our guide free.
Add a Comment