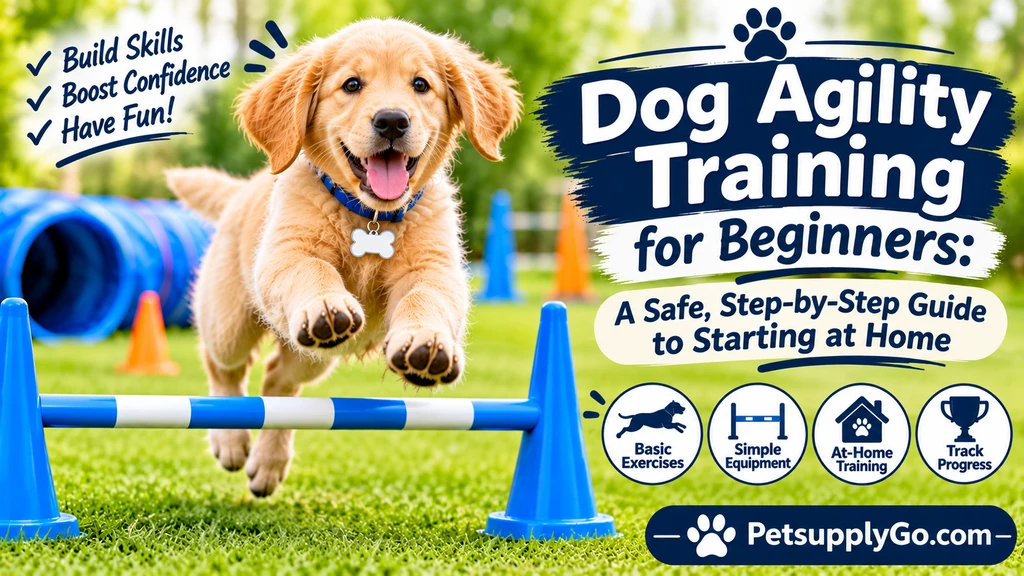
Picture a dog flying through a tunnel, leaping a jump, and weaving through a row of poles with a huge grin on their face while their handler jogs alongside. It looks like magic on TV. The good news is that it is not magic. It is training, and nearly any healthy dog can learn the basics of it, in a backyard, a park, or a living room.
Agility is one of the most fun things you can do with a dog. It burns energy, builds confidence, sharpens focus, and strengthens the bond between you and your dog. It also works for more dogs than people think. Border Collies may dominate the winner’s circle, but Labradors, Corgis, Chihuahuas, Pit Bulls, and mixed breeds from the shelter all do agility and love it.
It also needs to be done right. Agility involves jumping, climbing, and fast turns, and rushing the process is the fastest way to hurt a dog or turn a keen learner into a nervous one. This guide shows you how to start safely, from a vet check and the right gear, through each obstacle, to a simple eight-week plan you can follow at home.
The short answer: To start dog agility training, first get your vet’s okay and make sure your dog is old enough and fit enough. Build foundation skills like focus, recall, targeting, and a release word. Then introduce one low, safe obstacle at a time, starting with the tunnel and low jumps, using treats or a favorite toy as rewards. Keep sessions short, five to fifteen minutes, end on a win, and never force your dog over or through anything. Add weave poles, a pause table, and contact obstacles like the A-frame slowly, ideally with an instructor. Always warm up before and cool down after, and keep jump heights low until your dog’s growth plates have closed and your vet agrees.
This guide covers what agility is, who it suits, vet and age guidelines, the gear you need, each obstacle step by step, basic handling, warm-ups and conditioning, how to fix common problems, how to join classes and competitions, and how to look after your dog’s body and paws. There is an eight-week beginner plan and a shopping checklist near the end. Use the contents list to jump around.
Key Takeaways
- Agility is a sport where a dog runs a course of obstacles, such as jumps, tunnels, weave poles, and ramps, guided by a handler. It is also an excellent form of exercise and mental work for pet dogs, whether or not you ever compete.
- Almost any healthy dog can try agility. Breed matters less than health, fitness, and attitude. Mixed breeds and small dogs are welcome.
- Check with your vet first. Agility is physically demanding, and some dogs, including puppies, seniors, and dogs with joint, spine, or breathing problems, need modified plans.
- Protect growing joints. Keep jumps very low or on the ground for puppies and young dogs, and avoid repetitive jumping until your vet says growth plates have closed.
- Foundation skills come first. A dog who can focus, come when called, touch a target, and wait for a release word learns obstacles faster and safer.
- Go slowly and make it fun. Use high-value rewards, keep sessions short, and let your dog choose to participate.
- Teach one obstacle at a time. Start with the tunnel and low jumps, then add weave poles, the pause table, and finally contact obstacles.
- Warm up and cool down every time. A five-minute warm-up and a calm cooldown reduce injury risk.
- Safe equipment and safe surfaces matter. Avoid slick floors, hard concrete, and wobbly or poorly made obstacles.
- Classes and clubs help, especially for contact obstacles. A good instructor spots problems you may miss.
- Stop at any sign of pain, fear, or exhaustion. Limping, yelping, refusing to move, or heavy panting means it is time to end the session and, if it continues, call your vet.
Contents
- What Is Dog Agility?
- Benefits of Agility Training
- Is Agility Right for Your Dog?
- Breeds and Mixed Breeds
- Vet Check and Health Basics
- Age Guidelines: Puppies, Adults, and Seniors
- Gear for Your Dog and for You
- The Main Agility Obstacles
- Where and How to Set Up
- DIY Equipment vs. Store-Bought
- Motivation and Rewards
- Foundation Skills Before Obstacles
- How Dogs Learn: Core Training Principles
- Training the Tunnel
- Training Jumps
- Training the Tire Jump
- Training Weave Poles
- Training the Pause Table
- Training the A-Frame
- Training the Dog Walk
- Training the Teeter
- Training the Broad Jump and Chute
- Handling Basics: Cues, Crosses, and Sequences
- Warm-Up, Cool-Down, and Conditioning
- Weather, Surfaces, and Paw Care
- Agility for Small Dogs
- Agility for Large and Giant Dogs
- Agility for Flat-Faced Breeds
- Agility for Senior Dogs
- Classes, Clubs, and Trainers
- Agility Competitions
- Fixing Common Problems
- Common Mistakes
- Injuries: Signs, First Aid, and Recovery
- An 8-Week Beginner Plan
- Shopping Checklist
- Final Thoughts
- 30 Frequently Asked Questions
What Is Dog Agility?
Dog agility is a sport in which a handler directs a dog through a timed obstacle course. A typical course includes jumps, tunnels, weave poles, a pause table, and contact obstacles such as the A-frame, the dog walk, and the teeter-totter, which is a seesaw. The dog must complete the obstacles in the right order, and in competition, with as few mistakes and as little time as possible.
It Started With Dog Shows
Agility began in the United Kingdom in the late 1970s as a crowd-pleasing show to entertain spectators between events at a major dog show. It was modeled loosely on horse show jumping. It caught on fast, spread around the world, and became a popular sport in the United States, with several organizations hosting trials today.
It Is Also Great for Pet Dogs
You do not need to compete. Many people do agility purely for fun, using homemade or store-bought equipment in their yards. For a pet dog, agility is a structured way to exercise the body and the brain, and to strengthen communication between dog and owner.
What a Dog Learns
- To follow directions from a distance
- To focus in a distracting environment
- To move confidently over, under, and through unusual objects
- Body awareness and balance
- Impulse control, such as waiting for a release cue
- To work as a team with you
What a Handler Learns
- To give clear, consistent cues
- To reward timing and accuracy
- To read a dog’s body language
- To plan a route and move efficiently
- Patience and good humor
Levels of Involvement
- Backyard fun: a few jumps and a tunnel on weekends.
- Classes: a weekly group or private lesson with an instructor.
- Club training and fun matches: low-pressure practice with other teams.
- Competition: formal trials with titles and rankings.
Pick what suits you and your dog. There is no wrong level.
Benefits of Agility Training
Agility offers rewards for both ends of the leash.
Physical Exercise
Agility works the whole body. Running, jumping, turning, and balancing build muscle, stamina, and coordination. It is a great outlet for energetic dogs, and a gentler version suits dogs who need lower-impact exercise.
Mental Stimulation
Learning obstacles, sequences, and cues is mentally tiring. A short agility session can tire a dog out as much as a long walk. Mental work helps reduce boredom-driven problems like destructive chewing and nuisance barking.
Confidence Building
Shy and nervous dogs often blossom in agility. Conquering a wobbly board, a dark tunnel, or a new obstacle, with praise and treats, builds real confidence. Progress is gradual and always at the dog’s pace.
Stronger Bond
Working as a team builds trust and communication. Your dog learns to look to you for guidance, and you learn to understand your dog.
Better Obedience and Focus
Foundation skills such as recall, stay, and attention transfer into everyday life. Many owners report better manners on walks and at home.
Weight Management
Regular, appropriate exercise helps maintain a healthy weight, which protects joints and overall health.
A Constructive Outlet
Dogs bred for jobs, like herding and retrieving, often struggle without a purpose. Agility gives them one.
Social Opportunities
Classes and clubs bring dog lovers together. Many people make lasting friends through the sport.
Fun
Perhaps the biggest benefit: you will both have a great time.
Is Agility Right for Your Dog?
Most dogs can enjoy some form of agility, but not every dog should do high-impact versions.
Signs Your Dog May Love It
- High energy and plenty of enthusiasm
- Motivated by food, toys, or praise
- Interested in new things and places
- Willing to follow you
- Athletic, agile, and coordinated, or at least happy to try
Signs to Go Extra Slow
- Fearful or noise-sensitive dogs. Go very gradually, and keep sessions short and easy.
- Easily overexcited dogs. Build impulse control first.
- Dogs who guard toys or treats. Use appropriate, safe rewards, and consider professional help.
- Dogs with a history of injury, joint disease, or surgery. Get veterinary guidance.
Situations That Need Vet Approval or Modified Plans
- Puppies and adolescents, because of developing joints
- Seniors and dogs with arthritis
- Overweight dogs
- Dogs with hip or elbow dysplasia, spinal problems, heart disease, or breathing problems
- Flat-faced breeds that overheat easily
- Dogs with long backs, like Dachshunds, who need extra care with jumping and ramps
It Is Not About Perfection
A dog who zooms around, misses the weave poles, and spins in circles is still having a great time. The goal is to build skills, confidence, and joy.
Breeds and Mixed Breeds
Agility is open to dogs of all shapes and sizes.
Breeds That Often Excel
- Border Collies: fast, smart, and obsessed with work.
- Australian Shepherds and Shetland Sheepdogs: quick learners with plenty of drive.
- Belgian Malinois and German Shepherds: athletic and trainable.
- Jack Russell and Parson Russell Terriers: fearless and fast.
- Papillons and Miniature Poodles: clever, agile small dogs.
- Corgis: surprisingly fast for short legs.
- Labradors and Golden Retrievers: enthusiastic and food-motivated, though sometimes slower.
- Mixed breeds: can be outstanding. Many organizations welcome them.
Breeds That Can Still Enjoy It
Bulldogs, Pugs, Basset Hounds, Great Danes, and many others can enjoy modified, low-impact versions: tunnels, targets, low jumps, and pause tables. Their body shape means you should follow veterinary guidance and avoid extremes.
What Really Matters
- Health and fitness
- Motivation and attitude
- A good bond with you
- Safe, thoughtful training
Size Does Not Matter
Competitions typically group dogs by jump height, so small and large dogs compete fairly. Small dogs can be fast and fearless.
Choosing a Dog for Agility
If you are thinking of getting a dog for agility, look for a healthy, sociable, confident dog from a responsible source. But please remember that the best agility dog is the one you already have.
Vet Check and Health Basics
Before you begin, schedule a veterinary checkup. It is the most important step.
What to Ask Your Vet
- Is my dog physically ready for agility?
- Are there any joint, spine, heart, or breathing concerns?
- Is my dog at a healthy weight?
- What jump height is safe for now?
- Should I avoid certain obstacles?
- How should I manage my dog’s growth plates, if young?
- Are vaccinations and parasite prevention up to date?
Common Health Considerations
Hip and elbow dysplasia: Joint problems that can be made worse by repetitive impact. Dogs with these conditions may need low-impact activity only.
Cruciate (knee) injuries: Common in active dogs. Poor conditioning, sudden twisting, and obesity raise the risk.
Back problems: Long-backed breeds can be prone to disc disease and should avoid high jumps and steep climbing unless cleared by a vet.
Heart and lung conditions: Need veterinary clearance.
Arthritis: Common in older dogs. Gentle, low-impact activity may help, under guidance.
Overweight: Extra weight strains joints. Reach a healthy weight before ramping up.
Heat sensitivity: Flat-faced breeds, thick-coated dogs, and overweight dogs overheat easily.
Keep Up With Prevention
- Vaccinations
- Flea, tick, and heartworm prevention
- Regular deworming and fecal tests
- Dental care
- Nail trims, since overgrown nails affect balance and grip
A Healthy Weight Matters
You should be able to feel your dog’s ribs under a thin layer of fat, and see a waist from above. Ask your vet to confirm your dog’s ideal weight.
Consider Physical Therapy
Canine fitness and rehabilitation professionals can assess your dog’s strength and flexibility and suggest conditioning exercises. This is especially helpful for dogs with past injuries or for serious competitors.
Age Guidelines: Puppies, Adults, and Seniors
Age affects what is safe.
Puppies (Under About 12 Months)
Puppies have growth plates, areas of developing cartilage near the ends of the long bones. Until those plates close, repetitive jumping, steep climbing, and hard twisting can risk injury. Growth plate closure varies by breed and size, often around 12 to 18 months, and later in giant breeds.
What puppies can do:
- Foundation skills: name recognition, focus, recall, targets, sit, stay
- Flat work and fun movement
- Tunnels (short, straight, and wide)
- Bars on the ground or very low, so they walk or step over
- Balance work on low, stable surfaces, like a wide board on the ground
- Body awareness exercises, like standing on a cushion or wobble pad
- Socialization to new surfaces, sounds, and objects
What puppies should avoid:
- Jumping at height
- Repetitive jumping
- High or steep contact obstacles
- Long, intense sessions
- Rough surfaces and slippery floors
See our puppy starter kit guide for the basics you will need in the first months, and ask your vet when jumping is appropriate for your puppy.
Adolescents (About 12 to 24 Months)
Dogs may look grown but still be developing. Increase difficulty gradually, with vet guidance. Adolescents can also be distracted and easily excited, so patience and consistent training help.
Adults
Healthy adult dogs can do the full range of agility. Maintain conditioning, warm up well, and manage workload.
Competition Age Limits
Organizations set minimum ages for competition, often around 12 to 18 months. Check current rules for the organization you are interested in.
Seniors
Older dogs can enjoy gentle agility with veterinary approval. Use low jumps, flat tunnels, targeting, and balance work. Pay attention to joints, stamina, and comfort. A good, supportive resting spot afterward matters, so see our guide to dog beds that support large dogs’ joints.
When in Doubt
Ask your vet. It is always better to wait than to rush.
Gear for Your Dog and for You
You do not need much to start, but a few things matter.
For Your Dog
Collar and harness: Collars can snag on equipment, so many handlers remove the collar during agility sessions. If you use a harness for travel or warm-up walks, choose one that does not restrict shoulder movement, and take it off for obstacles unless it is designed for sport. For strong dogs on the walk to the field, see our guide to dog harnesses for large dogs.
Leash: A lightweight six-foot leash for the walk in, and a long line for early recall work in unfenced areas.
Well-trimmed nails: Long nails reduce grip and change posture. Trim regularly.
ID tag and microchip: Even in a fenced area, keep identification current. For off-leash training outdoors, a tracker adds peace of mind. Our guide to GPS dog trackers compares options.
Paw protection: For rough or hot surfaces, consider booties or paw balm. Always check pads afterward.
Weather gear: For cold, wet days, a fitted coat helps thin-coated dogs stay warm during breaks. See our guide to dog winter coats and our post on whether dogs need sweaters. Remove clothing during actual obstacle work so nothing snags.
Rewards
- Small, soft, high-value treats. Single-ingredient options work well. See our guide to freeze-dried dog treats for training.
- A favorite tug or fetch toy. Durable toys last longer. For power chewers, our guide to indestructible dog toys can help.
- A treat pouch for quick access.
For You
- Comfortable, closed-toe athletic shoes with good grip
- Clothing you can move in
- A treat pouch or belt
- Water for you and your dog
- A watch or phone timer for short sessions
For Safety
- A collapsible water bowl
- A first aid kit with gauze, vet wrap, tweezers, and saline
- Towels
- A shaded spot for breaks
The Main Agility Obstacles
Here is a quick overview of what you will meet.
Jumps (Hurdles)
Bars set on two uprights that the dog jumps over. Heights are adjustable. Start on the ground.
Tire Jump
A hoop, often a tire shape, suspended in a frame. The dog jumps through it.
Tunnels
Open tunnels, either straight or curved, that the dog runs through. The collapsed tunnel, or chute, has a closed fabric end that the dog pushes through.
Weave Poles
A row of upright poles, usually six to twelve, that the dog weaves through, entering with the first pole on their left shoulder.
Pause Table
A raised table where the dog must stop, sit or lie down for a few seconds.
A-Frame
Two ramps joined at the top in an A shape. The dog climbs up and down. It has colored contact zones at the bottom.
Dog Walk
An elevated plank with ramps at both ends, which the dog runs across.
Teeter-Totter (Seesaw)
A plank that tips as the dog crosses the midpoint.
Broad Jump (Long Jump)
A series of low boards set in sequence, which the dog jumps over as a single leap.
Contact Obstacles
The A-frame, dog walk, and teeter are called contact obstacles because the dog must touch the contact zone at the end of each ramp. They need careful, gradual training.
Where to Start
Begin with the tunnel, low jumps, the pause table, and targeting. Introduce weave poles and contacts later.
Where and How to Set Up
A safe space matters as much as the equipment.
Choosing a Space
- Flat and level: No holes, bumps, or slopes.
- Fenced or secure: Especially for early training.
- Enough room: About 20 by 30 feet is a comfortable minimum for a small beginner setup. Smaller spaces work with fewer obstacles.
- Free from hazards: Remove rocks, sticks, glass, sprinklers, and sharp objects.
- Away from distractions: Start away from busy roads and heavy dog traffic.
Surfaces
Best: Even, well-kept grass, rubber matting, or a quality agility surface. Good traction and a little cushion protect joints.
Use with care: Packed dirt, gravel, and sand. These may be fine if even and free of debris, but check often.
Avoid: Concrete, asphalt, slippery indoor floors, wet tile, and loose uneven ground. Hard surfaces strain joints, and slippery ones cause falls.
Indoor Options
Garages, basements, and living rooms can host early training such as targeting, tunnels, and ground-level jumps. Use non-slip mats, and keep obstacles low.
Layout Basics
- Space obstacles several feet apart so your dog has room to approach and land.
- Keep contact obstacles away from fences and walls.
- Start with two or three obstacles, not a full course.
- Set up a “launch” spot where you start.
Weather and Time of Day
Avoid the hottest part of the day. In cold weather, warm up well, and shorten sessions.
Cleanup
After outdoor sessions, wipe or rinse paws. Our guide to cleaning dog paws shows quick, safe methods after muddy, wet, or salty days.
DIY Equipment vs. Store-Bought
Equipment can be homemade or purchased.
DIY Options
Jumps: PVC pipe on simple uprights or stacked supports. Use lightweight bars that fall easily if hit, so your dog is not hurt. Avoid heavy, rigid bars.
Tire or hoop: A hula hoop or flexible hoop suspended safely, or a lightweight frame.
Tunnels: A children’s play tunnel can work for early practice, but make sure it is sturdy, stable, and anchored so it does not roll or collapse on your dog.
Weave poles: Plastic poles or pipes pushed into the ground, or set in a simple base.
Pause table: A sturdy, non-slip platform at a safe height.
Wobble board: A board on a small, stable pivot for balance practice, kept very low.
Safety Rules for DIY
- Check stability. Nothing should wobble, tip, or roll unexpectedly.
- Avoid sharp edges, splinters, and exposed bolts.
- Use non-slip surfaces, such as rubber or textured paint with sand.
- Ensure jump bars can fall away easily.
- Inspect before every session.
- Keep heights low.
Store-Bought Equipment
Commercial agility sets offer standard sizes, adjustable heights, and tested designs. Look for:
- Sturdy construction
- Adjustable height
- Non-slip surfaces on contact obstacles
- Breakaway or lightweight bars
- Stable bases
- Weather-resistant materials
Which Should You Choose?
For a beginner, a mix works well: a few simple DIY pieces and one or two quality purchased pieces, such as a tunnel and adjustable jumps. As you progress, invest in equipment that matches standard sizes.
Contact Obstacles Need Extra Care
A poorly built A-frame, dog walk, or teeter can seriously injure a dog. For contacts, use professionally made equipment or train at a facility.
Motivation and Rewards
Your dog needs a reason to play.
Find What Your Dog Loves
- Food: Soft, tiny, smelly treats are the easiest to use. Cut them pea-sized.
- Toys: Many dogs go wild for tug, a ball, or a squeaky toy.
- Play: Chasing, wrestling, and happy talk.
- Praise and touch: Some dogs love a chest scratch and a cheerful “yes!”
- The obstacle itself: Many dogs find tunnels naturally fun.
Offer a few options and watch what your dog chooses.
Reward Rules
- Mark the moment. Say “yes!” or click at the exact instant your dog does the right thing, then reward.
- Reward fast and often at first. Early learning needs frequent rewards.
- Make it worth the effort. Use better rewards for harder tasks.
- Fade gradually. As skills strengthen, reward less often but unpredictably.
- Do not bribe. Show the reward after the behavior, not before, once your dog understands what is being asked.
Keep Treat Calories in Check
Training treats add up. Count them as part of your dog’s daily food, or use part of the regular meal.
Toy Play
A tug or ball reward can supercharge enthusiasm. Teach “drop it” or “trade” so toy rewards do not turn into guarding. Keep toys safe and sized correctly.
Calm Rewards
Some dogs get too excited with toys. Use food, or add a calm cooldown with a lick mat afterward to help your dog settle.
Do Not Train a Hungry or Overfull Dog
A slightly hungry dog is often more motivated, but never train a ravenous dog or one who has just eaten a large meal.
Foundation Skills Before Obstacles
Dogs learn obstacles faster when the basics are solid. Practice these at home first.
Name Recognition and Focus
Say your dog’s name. When your dog looks at you, mark and reward. Practice with distractions, gradually. A dog who checks in with you is much easier to handle.
A Marker Word or Clicker
Teach your dog that “yes!” or a click means a reward is coming. Say the word, then give a treat, about ten times. Then start marking real behaviors.
A Release Word
A release word such as “okay” or “free” tells your dog the exercise is over. It prevents dogs from leaving obstacles early and teaches patience. Practice with sits and stays: ask for the behavior, wait a moment, say “okay,” and reward.
Sit, Down, and Stay
These are useful for the pause table, start-line waits, and general control. Keep stays short at first, and build slowly.
Recall
A reliable “come” is essential, especially for outdoor practice. Practice in quiet places with high-value treats, and slowly add distractions. Use a long line in unfenced areas.
Hand Target (Touch)
Teach your dog to touch their nose to your palm. It is a simple way to guide your dog, move them into position, and build focus. Later, teach a nose touch to a small plate or mat, which becomes the base for contact obstacles and the pause table.
Foot Target (Paws on a Mat)
Teach your dog to place front paws, or all four, on a small mat on cue. This builds the skill for contact zones and table behaviors.
Focus Walking and Loose Leash
A dog who walks beside you without pulling is easier to manage between obstacles. Reward position near your leg, and practice turns.
Left and Right Cues
Teach your dog simple directional cues, such as “left” and “right,” or “come” and “go.” Do it with treats tossed in each direction at first, and slowly build up.
Wait and Impulse Control
Practice waiting at doors, before bowls, and at the start of a game. Impulse control keeps excited dogs safer.
Tug With Rules
If your dog loves tug, teach rules: take the toy on cue, drop it on cue, and stop if teeth touch skin. This turns a toy into a controlled reward.
Body Awareness and Balance
Simple games build body control: stepping over poles on the ground, standing on a low cushion or wobble pad, and walking over different surfaces. Keep it low and safe.
Confidence With New Things
Introduce your dog to new surfaces, sounds, and objects with treats. A dog who is used to novelty adapts more easily to obstacles.
How Long Foundations Take
For many dogs, a few weeks of daily practice is enough to start on obstacles. Keep practicing foundations throughout training.
How Dogs Learn: Core Training Principles
These principles make training smoother and safer.
Short and Sweet
Five to fifteen minutes is plenty. End while your dog is still eager. Several short sessions beat one long one.
Set Your Dog Up to Succeed
Make each step small. If your dog is struggling, make it easier. Aim for about 80 percent success.
Reward Choices, Never Force
Never push, pull, or throw a dog over or through an obstacle. Let your dog choose and be rewarded for it. A dog who is forced can become fearful and refuse equipment altogether.
Shape Behaviors
Reward small steps toward the goal. If your dog looks at the tunnel, mark and reward. Then reward a step closer. Then a step in. Shaping builds confident, thinking dogs.
Lure, Then Fade
A treat in your hand can guide a dog through an obstacle at first. Once your dog understands, fade the lure, and use your hand as a signal. Then reward after the obstacle.
Keep Criteria Consistent
Decide what counts as success, such as “all four paws through the tunnel,” and stick to it. Change one thing at a time: height, speed, distance, or distraction, never several at once.
Go Back a Step When Needed
If your dog hesitates, drop back to an easier version. It is not failure. It is smart training.
Keep Energy Appropriate
Some dogs need a lively voice to get going. Others need calm. Adjust your energy to your dog.
Practice in Different Places
Dogs do not generalize well. Once a skill works at home, try it in a different spot, then a new environment.
Stay Positive
If you get frustrated, take a break. Dogs pick up on your mood.
End on a Win
Finish with an easy success and a big reward.
Training the Tunnel
The tunnel is the best first obstacle. Most dogs find it exciting, and it builds confidence.
What You Need
- A collapsible open tunnel, ideally with a wide diameter and a short length at first
- Stakes or sandbags to anchor it so it cannot roll
- Treats or a favorite toy
Step 1: Introduction
Scrunch the tunnel down so it is very short, only a foot or two long, and you can see through it. Let your dog sniff it. Reward curiosity.
Step 2: Lure Through
Hold a treat at the far end, call your dog, and let them run through the short tunnel to get it. Praise and reward as they come out. Have a helper hold the dog at one end if needed while you call from the other side.
Step 3: Add Cue and Length
Say “tunnel” just as your dog enters. Slowly lengthen the tunnel, a foot or two at a time, over several sessions.
Step 4: Add a Curve
Introduce gentle curves once your dog is confident in a straight tunnel. Anchor the tunnel well.
Step 5: Send to the Tunnel
Stand a few feet away and point to the entrance. Say “tunnel.” Reward at the exit. Gradually increase distance.
Tips
- Never push a dog in. Let them choose.
- Make the exit exciting with a toy or treat.
- If your dog hesitates, make the tunnel shorter and wider.
- Watch for dogs who spin or take shortcuts. Reward only a full pass through.
Safety
- Anchor the tunnel so it cannot roll or collapse on your dog.
- Check for tears or sharp edges.
- Keep the area clear.
Small Dogs and Puppies
Short, wide tunnels are best. Puppies can enjoy tunnels safely because they involve no jumping.
Training Jumps
Jumps are the heart of agility, and the one to handle most carefully.
Safety First
- Start with the bar on the ground.
- Keep heights low, well below your dog’s elbow, until your dog is mature and your vet agrees.
- Use lightweight bars that fall off if hit.
- Never use jumps on slippery or hard ground.
- Do not repeat jumps too many times in a row.
Step 1: Walk Over a Ground Bar
Lay a pole on the ground. Walk your dog over it on a leash or with a treat lure. Reward the step across. Let them get used to the feel of the pole under their paws.
Step 2: Raise Slightly
Raise the bar a few inches, or use a very low jump. Lure your dog over. Say “jump” as they cross. Reward on the other side.
Step 3: Add Distance
Stand a few feet from the jump, and let your dog approach and take it. Reward after landing. Gradually build the distance from you to the jump.
Step 4: Add Speed
Once your dog is comfortable, gradually increase speed. Keep the bar low. Reward a smooth, confident jump.
Step 5: Introduce Sequences
Place two low jumps a short distance apart. Add a third later. Always reward the finish.
Teach a Safe Landing
Jumping is more about landing. Teach your dog to land squarely and keep moving forward. Avoid excited twists or sharp turns immediately after the jump.
Spacing for Beginners
For small groups of jumps, leave plenty of space between them, about two to three times your dog’s body length, so your dog can take a natural stride. Ask an instructor for exact spacing that suits your dog’s size.
Common Problems
- Dog runs around the jump: Lower the bar, use wings or barriers to guide, and reward the jump.
- Dog knocks bars often: Lower the height, slow down, and check your dog’s fitness and vision.
- Dog stops at the jump: Lower it to the ground and rebuild confidence.
Training the Tire Jump
The tire looks scary but is often easy to teach.
Setup
Use a lightweight hoop, a breakaway design, or a very low hoop frame that is stable. Start with the opening large and the hoop at ground level.
Step 1: Walk Through
Put the hoop on the ground. Lure your dog to walk through it. Reward.
Step 2: Raise Slightly
Raise it a few inches. Lure your dog through. Add a cue such as “tire” or “through.”
Step 3: Build Confidence
Raise the hoop gradually, keeping it low for beginners. Reward every success.
Step 4: Add Distance and Speed
As your dog gains confidence, send them from a distance.
Safety
- Never use a rigid, tight hoop. A breakaway or wide design is safer.
- Keep the opening large.
- Keep the height low for puppies and small dogs.
- Make sure it cannot tip over.
Training Weave Poles
Weave poles are the most technical obstacle, and often the one that takes longest to master. Be patient.
Why It Is Hard
The dog must weave rapidly in and out of poles, entering with the first pole on their left side. It is a complex skill with no natural analog, so it needs clear, patient teaching.
Start With a Method
Several approaches exist. Here are three popular ones.
Method 1: Channel Weaves
- Set up poles with a wide channel between them, so your dog can run straight through.
- Reward for running through.
- Gradually narrow the channel over many sessions until the poles are in a straight line.
Method 2: Two-by-Two
- Start with two poles. Teach your dog to weave through them.
- Add two more, and so on, until you have a full set of six or twelve.
- Reward at each step.
Method 3: Guide Wires or Guides
Use a guide, like a wire along the poles, that nudges your dog into the correct path. Remove the guide gradually as your dog learns.
Training Tips
- Start with a small number of poles.
- Keep sessions very short.
- Reward every few poles at first, and fade rewards as your dog improves.
- Use a verbal cue like “weave.”
- Keep your voice upbeat.
- Do not drag or force. Let your dog figure it out.
- Practice entry, because many errors happen at the first pole.
Safety
- Make sure poles are firmly set and not sharp.
- Use flexible poles to reduce injury risk.
- Do not repeat too many times in a row. Weaving is hard on joints, particularly the spine.
Be Patient
Many dogs take weeks or months to weave reliably. That is normal.
Training the Pause Table
The pause table teaches control and gives your dog a break.
Setup
Use a low, sturdy, non-slip table. For small dogs, start with a few inches of height. For larger dogs, still keep it low at first.
Step 1: Target Practice
Teach your dog to put front paws, then all four paws, on a mat. Reward.
Step 2: Mat on the Table
Put the mat on the table. Lure your dog to jump or step up. Reward for being on it.
Step 3: Add a Position
Ask for a sit or down on the table. Reward for holding it. Say “table” or “park.”
Step 4: Add Duration
Build the time slowly, from a second to a few seconds. Release with your release word.
Step 5: Add Distance
Stand further away and send your dog to the table. Reward on the table.
Tips
- Reward on the table, not after leaving, so your dog learns to stay.
- Make sure your dog does not slip.
- Use a low height to protect joints.
- Do not force a down on a hot or slippery surface.
Training the A-Frame
The A-frame is a contact obstacle and should be introduced gradually, preferably with an instructor.
Safety First
- Use professionally built equipment with a non-slip surface.
- Start with the ramps at a very low angle, or use a flat board.
- Never put a dog on high equipment before they are confident.
- Do not rush, especially with puppies, seniors, and long-backed dogs.
- Always have a spotter nearby.
Step 1: Flat Board
Place a wide board on the ground. Teach your dog to walk across, and to stop with front feet on the end. Reward.
Step 2: Slight Incline
Raise one end slightly. Lure your dog across. Reward at the end.
Step 3: Teach the Contact Position
Many handlers teach a “two feet on, two feet off” stop at the bottom, with the front paws on the ground and the rear paws on the ramp. Use a target mat at the base. Reward for holding the position.
Step 4: Combine Ramps
Gradually build up to the full A-frame, raising the apex slowly. Keep it low at first.
Step 5: Add Speed
When your dog is confident, add speed. Reward the contact.
Tips
- Use a low-angle, wide ramp for beginners.
- Reward at the base.
- Do not let your dog jump off the top or sides.
- Keep sessions short.
Safety Notes
- Check surfaces for slipperiness.
- Keep nails trimmed.
- Do not use if the dog is fearful. Go back and rebuild.
Training the Dog Walk
The dog walk is a long, narrow plank. It requires balance and confidence.
Safety First
- Start with a plank on the ground.
- Use equipment with a non-slip surface and stable supports.
- Raise it very gradually.
- Always spot your dog.
Step 1: Plank on the Ground
Teach your dog to walk along a wide plank on the ground. Reward steadiness.
Step 2: Raise Slightly
Raise it a few inches and repeat. Keep rewarding.
Step 3: Add Ramps
Introduce ramps at low angles. Reward at the top and bottom.
Step 4: Contact Zones
Teach a stop or a running contact at the end, depending on your goal. Beginners usually use a stopped contact.
Tips
- Keep the board wide.
- Never rush.
- Do not use if your dog is afraid of heights or shaky.
- Watch for dizziness or fatigue.
Training the Teeter
The teeter, or seesaw, can startle dogs because it moves.
Safety First
- Start with a very low, slow-moving seesaw.
- Use a stable, well-made design.
- Control the tip speed with a helper.
- Introduce slowly.
Step 1: Introduce the Movement
Let your dog stand on a stable board that moves very slightly. Reward calm behavior.
Step 2: Tip Gently
Have a helper gently tip the plank while your dog is on it. Reward.
Step 3: Walk Across
Lure your dog across the board while a helper controls the tip speed. Reward at the end.
Step 4: Add Speed and Contact
Gradually build up confidence and speed. Reward the contact zone.
Tips
- Always control the tip.
- Reward heavily. The teeter can be scary.
- Never force a dog onto it.
- Use a very low teeter for small dogs.
Training the Broad Jump and Chute
Broad Jump
A series of low boards that the dog leaps across.
- Start with one board, so it is like a low jump.
- Add a second board close by. Lure your dog over both.
- Gradually add boards and distance.
- Keep boards low and stable.
Tips: Teach it after your dog is confident with low jumps, and keep the height and length modest.
Chute (Collapsed Tunnel)
A tunnel with a fabric chute that the dog pushes through.
- Hold the fabric up so your dog can see through.
- Lure your dog through the opening.
- Lower the fabric slowly, until your dog pushes through it.
- Reward at the exit.
Tips: Some dogs find fabric scary. Go slowly, keep the opening wide, and reward bravery. Make sure the fabric is clean and does not catch on collars, so remove the collar for this exercise.
Handling Basics: Cues, Crosses, and Sequences
Once your dog knows a few obstacles, it is time to put them together. Handling is how you guide your dog through a course.
Clear Cues
Use short, consistent words for each obstacle: “jump,” “tunnel,” “weave,” “table,” “climb” for the A-frame. Use a direction cue like “come” or “left” and “right.” Say the cue before you move, so your dog knows what is coming.
Body Language Counts
Dogs read your body more than your words. Your shoulders, feet, and hands show the path. Face where you want your dog to go, point with your arm, and move toward the next obstacle.
Handler Position
- Dog on the left or right: pick a side to start. You can teach both later.
- Handling from a distance: build up as your dog learns to work away from you.
Sending and Pulling
- Send: direct your dog away from you toward an obstacle.
- Pull: call your dog back toward you.
Front Cross
You turn to face your dog and change sides in front of them. It is a clear signal of a change in direction, and often a smooth one for beginners.
Rear Cross
You stay behind your dog’s line and cross behind them to change sides. It is useful but trickier to time. Learn it with an instructor.
Blind Cross
You cross while turned away from the dog. It is more advanced.
Sequencing
- Start with two obstacles in a row.
- Add a third.
- Practice with turns.
- Add weave poles and contacts when your dog is ready.
- Reward after the sequence, not between each obstacle.
Course Memory
Even a short route can be confusing. Walk it yourself first, and plan where you will be.
Keep It Fun
If your dog makes mistakes, calmly reset. Do not scold.
Practice Both Sides
Teach your dog to work on your left and right. It makes you a more flexible team.
Warm-Up, Cool-Down, and Conditioning
A strong, prepared body is a safe body.
Why It Matters
Agility is athletic. Muscles, tendons, and ligaments need time to prepare. Warm-ups reduce stiffness and injury risk, and cooldowns help muscles recover.
A Simple Warm-Up (5 to 10 Minutes)
- A brisk walk for a few minutes.
- Gentle trotting.
- Figure-eights around cones, or your legs.
- Sit-to-stand repetitions, a few times.
- Gentle stretching, such as treat-lured turns to each side. Avoid forcing any stretch.
A Simple Cool-Down (5 to 10 Minutes)
- A slow walk.
- Gentle massage of the shoulders, back, and hips if your dog likes it.
- Fresh water.
- A calm rest, perhaps with a lick mat or chew.
- A soft, supportive place to recover.
Conditioning Exercises
Build strength and balance outside of sessions.
- Hill walks: moderate, steady slopes.
- Walking over low poles: builds coordination.
- Balance work: standing on a wobble cushion or foam pad.
- Sit-to-stand: strengthens hind end.
- Backing up: a few steps backward on cue.
- Swimming: low-impact exercise, if your dog likes water and is safe in it.
- Core work: treat-lured stretches, with vet guidance.
Weight and Diet
Keep your dog at a healthy weight, and feed a complete and balanced diet. Avoid feeding a large meal right before a session, and wait until your dog has cooled down before a big meal.
Rest Days
Give your dog at least one or two rest days a week. Muscles repair on rest days.
Warning
Never stretch a cold muscle aggressively. If you are unsure about conditioning exercises, ask your vet or a canine rehabilitation professional.
Weather, Surfaces, and Paw Care
Environment affects safety.
Heat
- Train in the early morning or evening.
- Bring water.
- Take shade breaks.
- Watch for heavy panting, drooling, stumbling, or red gums. Stop immediately and cool your dog gradually.
- Test pavement or sand with the back of your hand. If it is too hot for you, it is too hot for paws.
Cold
- Warm up thoroughly.
- Keep sessions shorter.
- Cover thin-coated dogs between rounds with a coat.
- Watch for ice, which makes surfaces slippery.
Rain and Mud
- Wet equipment gets slippery. Check contact surfaces.
- Mud can hide holes and hazards.
- Dry your dog and wipe paws after sessions.
Paw Checks
After each session, check:
- Pads for cuts, cracks, and burns
- Between toes for burrs and debris
- Nails for splits and cracks
- Dewclaws for snags
Paw Care
- Keep nails trimmed.
- Trim paw fur if it traps debris.
- Use paw balm in dry or cold conditions, if recommended.
- Rinse and dry after muddy or salty sessions.
Surfaces Matter
Good footing prevents slips and strains. Check your training area regularly.
Agility for Small Dogs
Small dogs can be wonderful at agility.
Advantages
- Quick and nimble
- Lower impact on joints in many cases
- Easy to travel with
- Often highly motivated
Considerations
- Jump heights: Keep jumps very low. Small dogs can injure themselves if jumps are too high for their size.
- Equipment size: Choose smaller tunnels, narrower boards, and appropriate ramps.
- Surfaces: Use non-slip mats.
- Temperature: Small dogs get cold easily. Use a coat on cold days between runs.
- Dental and spinal care: Tiny dogs can be prone to back and kneecap problems. Check with your vet.
- Visibility: Keep a close eye on your dog in tall grass.
Fun Ideas
Tiny dogs shine at tunnels, targets, balance work, low jumps, and obstacle courses made from household objects.
Agility for Large and Giant Dogs
Big dogs can do agility, with care.
Advantages
- Powerful and enthusiastic
- Impressive jumpers and runners
Considerations
- Joint health: Large dogs are more prone to hip and elbow problems. Vet guidance is key.
- Growth plates: Giant breeds can take until 18 to 24 months to fully mature. Keep impact low until then.
- Landing forces: Heavy dogs land hard. Use soft surfaces and low heights.
- Equipment size and strength: Make sure obstacles are rated for your dog’s size.
- Weight control: Keep your dog lean.
- Overheating: Thick coats and large size raise heat risk.
- Recovery: Large dogs need a supportive resting place afterward. See our guide to large dog beds that support joints.
Good Starting Activities
Tunnels, targets, balance work, low jumps, pause table, and hiking over varied terrain.
Agility for Flat-Faced Breeds
Bulldogs, Pugs, Boston Terriers, Frenchies, and similar breeds need special caution.
Why
Short airways make breathing harder, and they overheat quickly. Exertion in warm weather can be dangerous.
Safe Approach
- Get a veterinary check, including breathing assessment.
- Choose cool, shaded times and places.
- Keep sessions very short and gentle.
- Use low-impact activities like targets and gentle tunnels.
- Avoid high-intensity running and big jumps.
- Watch for noisy breathing, blue or gray gums, collapse, or heavy panting. Stop and cool your dog immediately, and seek veterinary care.
Remember
A short, happy session of slow games is better than pushing too far.
Agility for Senior Dogs
Age does not mean the end of fun.
Benefits for Seniors
- Mental stimulation
- Gentle exercise
- Bonding time
- Confidence
Safe Modifications
- Ground-level poles and low bars
- Short, flat tunnels
- Targeting and balance work
- Slow pace
- Short sessions
- Soft surfaces
- No contact obstacles unless cleared by your vet
Watch For
- Stiffness after sessions
- Reluctance to move
- Panting and fatigue
- Limping
Support Recovery
- A warm, padded place to rest
- Gentle massage
- Regular vet checks
- Joint support recommended by your vet
- A good diet
Senior dogs often enjoy “brain games” more than speed, so lean into nose work, targeting, and tricks.
Classes, Clubs, and Trainers
You can learn a lot on your own, but good instruction helps.
Benefits of Classes
- Professional guidance on safe technique
- Quality equipment
- Distractions for training in new situations
- Feedback on handling
- A community of like-minded dog lovers
What to Look For in an Instructor
- Positive reinforcement methods
- A focus on safety and dog welfare
- Experience with different breeds and sizes
- Clear explanations
- Small class sizes
- Clean, safe facilities with good surfaces
Red Flags
- Harsh corrections or force
- Pressure to jump too high too soon
- Ignoring signs of stress or injury
- Overcrowded classes
Types of Classes
- Foundation classes: focus on basic skills and gentle introductions.
- Beginner agility: introduces low obstacles.
- Puppy foundations: age-appropriate play and body awareness.
- Fun and fitness classes: low-pressure, no competition.
- Competition prep: for those who want to compete.
Visit First
Watch a class before joining. Observe how dogs and handlers are treated.
Bring
- Treats and toys
- Water and a bowl
- A well-fitting collar or harness as the facility advises
- Vaccination records
- A mat or crate for rest breaks. If you use a crate, our crate training guide helps your dog settle calmly between turns.
Travel to Classes
Use a secure seat or crate in the car, and protect your upholstery from muddy paws. Our guide to dog car seat covers has easy options.
Agility Competitions
If you catch the bug, competition is the next step.
Organizations in the United States
Several national organizations host agility trials, including the American Kennel Club (AKC), the United States Dog Agility Association (USDAA), the North American Dog Agility Council (NADAC), the United Kennel Club (UKC), and others. Rules, jump heights, titles, and eligibility differ. Many welcome mixed breeds, sometimes through special programs. Check each organization’s current rules before you plan.
Typical Classes
- Standard: includes contact obstacles, weave poles, and jumps.
- Jumpers: jumps and tunnels only, no contacts.
- Games and special classes: variety and fun.
Levels
Competitors typically begin in novice classes and move up to higher levels with qualifying scores.
Jump Height Divisions
Dogs are grouped by their height at the shoulder (withers), so small and large dogs compete against similar-sized peers.
Minimum Age
Organizations often require dogs to be at least 12 to 18 months old before competing. Check current rules.
Before You Compete
- Make sure your dog has solid foundations and is physically mature.
- Confirm your dog is cleared by your vet.
- Attend a fun match or practice trial.
- Be ready for noise, crowds, and excitement.
Trial Day Tips
- Arrive early.
- Walk your dog and let them relax.
- Bring water, shade, a crate or mat, and treats.
- Warm up properly.
- Keep it fun, whatever the score.
- Cool down and rest afterward.
Keep Perspective
Agility is a game. If your dog is having fun and you are building a bond, you are winning.
Fixing Common Problems
Every agility dog hits a few bumps. Here is how to handle them.
My Dog Will Not Go Through the Tunnel
- Shorten and widen the tunnel so your dog can see out.
- Have a helper hold your dog while you call from the exit.
- Toss treats just inside the entrance, then deeper.
- Use a favorite toy at the exit.
- Never push your dog in.
My Dog Runs Around Jumps
- Lower the bar to the ground and reward every crossing.
- Use wings or barriers to guide the path.
- Make sure you are moving toward the jump, not away.
- Check that your dog is not in pain.
My Dog Knocks Bars
- Lower the height.
- Slow down and work on rhythm.
- Check your dog’s fitness, vision, and any pain.
- Practice with ground poles to build striding.
My Dog Is Afraid of the Equipment
- Go back to the simplest, lowest version.
- Let your dog explore on their own terms with treats.
- Keep sessions short and positive.
- Use a calm voice.
- Do not force. Work with a trainer if fear persists.
My Dog Ignores Me and Runs Off
- Work on focus and recall in low-distraction spaces.
- Use higher-value rewards.
- Keep your dog on a long line outdoors.
- Make yourself more interesting with games and movement.
- End sessions before your dog loses interest.
My Dog Barks and Spins
Barking and spinning often show excitement or frustration.
- Build impulse control with wait and sit exercises.
- Keep arousal in check before starting.
- Reward calm behavior.
- Take breaks.
- Use a calming routine between rounds.
My Dog Gets the Zoomies
- Provide exercise before training.
- Practice tricks and flat work to build control.
- Keep a toy for the “chase” as a reward.
- Use a release word.
My Dog Gets Too Excited and Nips
Overexcited dogs sometimes grab clothing or hands.
- Teach “tug with rules.”
- Wear sturdy clothing.
- Pause the game when teeth touch skin, then restart.
- Reduce intensity.
My Dog Loses Interest
- Shorten sessions.
- Use better rewards.
- Check health and fatigue.
- Vary the exercises.
- Make it more fun.
My Dog Is Stiff or Sore After Training
- Reduce intensity and frequency.
- Make sure warm-ups and cooldowns are thorough.
- Check surfaces and equipment.
- Rest.
- Call your vet if soreness continues.
My Dog Pops Out of the Weave Poles
- Reduce the number of poles.
- Return to channel or guide-wire work.
- Reward more often.
- Keep your position consistent.
- Be patient.
My Dog Will Not Stay on the Pause Table
- Reward on the table.
- Build duration very slowly.
- Check the surface for slipperiness.
- Practice “stay” separately.
My Dog Hesitates on Contact Obstacles
- Lower the angle.
- Use a wider plank.
- Reward every small step.
- Consider professional help.
I Am Frustrated
Take a break. Both of you need positive sessions. Return with a simpler goal and a fresh mindset.
Common Mistakes
- Skipping the vet check. Hidden health issues can make agility risky.
- Jumping too high, too soon. Protect growing and aging joints.
- Training puppies like adults. Puppies need gentle, low-impact work.
- Forcing a dog onto equipment. It damages trust and confidence.
- Skipping foundations. Obstacles are easier with focus, recall, and a release word.
- Overtraining. Long, repetitive sessions tire the body and the mind.
- Ignoring warm-ups and cooldowns.
- Training on slippery or hard surfaces.
- Using unsafe DIY equipment. Wobbly, heavy, or sharp obstacles cause injuries.
- Leaving a collar or clothing on during obstacles. It can snag.
- Rewarding late. Timing matters.
- Using punishment or harsh corrections.
- Rushing contact obstacles.
- Training in extreme heat or cold.
- Not teaching a release word.
- Skipping rest days.
- Comparing your dog to others.
- Ignoring signs of pain or stress.
- Skipping paw and body checks after sessions.
- Forgetting to have fun.
Injuries: Signs, First Aid, and Recovery
Agility is generally safe when done carefully, but injuries can happen.
Common Injuries
- Muscle strains: pulled muscles in the shoulders, back, or thighs.
- Sprains: ligament injuries, often in the wrist or ankle (hock).
- Cruciate ligament tears: serious knee injuries causing sudden lameness.
- Paw pad injuries: cuts, tears, and burns.
- Broken or torn nails.
- Back and neck pain.
- Shoulder and elbow strain.
- Heat-related illness.
Signs of Pain
- Limping or skipping
- Yelping or flinching
- Reluctance to jump or climb
- Stiffness, especially after resting
- Licking or chewing a particular spot
- Whining or restlessness
- Loss of enthusiasm
- Changes in posture or gait
- Aggression or withdrawal when touched
What to Do Right Away
- Stop the session.
- Keep your dog calm and still.
- Check paws, nails, and legs gently.
- Rinse minor cuts with clean water.
- Offer water.
- Rest your dog.
- Call your vet if limping lasts more than a day, the pain is severe, or you cannot find the cause.
Emergency Signs
Go to an emergency vet for:
- Inability to bear weight on a leg
- A swollen or deformed limb
- Heavy bleeding
- Collapse
- Labored breathing
- Pale or blue gums
- Signs of heatstroke, such as extreme panting, drooling, vomiting, stumbling, or unresponsiveness
- Suspected spinal injury, such as dragging legs or sudden paralysis
Recovery
Follow your vet’s plan. Rest is crucial. Do not return to agility until your vet clears your dog. A supportive bed, a calm environment, and gradual return to activity help. A lick mat or puzzle toy keeps an energetic dog calm and busy during rest.
Prevention
- Warm up and cool down.
- Keep your dog fit and lean.
- Use safe equipment and surfaces.
- Keep nails trimmed.
- Do not overtrain.
- Give rest days.
- Watch for early signs of soreness.
An 8-Week Beginner Plan
Here is a simple plan to adapt to your dog. Move more slowly if needed. Keep sessions to 5 to 15 minutes, and finish on a win.
Week 1: Check and Prepare
- Schedule a vet checkup and ask about jump height and obstacles.
- Set up a safe training area.
- Gather treats, a favorite toy, and a treat pouch.
- Start name recognition, marker word, and focus games.
- Practice a release word.
- Do three short sessions during the week.
Week 2: Foundations
- Practice sit, down, stay, and recall.
- Teach hand target and a mat target.
- Practice walking beside you.
- Introduce body awareness: stepping over ground poles and standing on a cushion.
- Add a short warm-up and cooldown routine.
Week 3: Tunnel and Confidence
- Introduce the short, scrunched tunnel.
- Reward your dog for going through.
- Add the cue “tunnel.”
- Slowly lengthen it.
- Add a calm cooldown walk.
Week 4: Low Jumps
- Start with a bar on the ground.
- Raise it only a little. Keep it low.
- Add the cue “jump.”
- Practice a few jumps with distance.
- Keep the number of jumps small.
Week 5: Pause Table and Targets
- Teach your dog to get on a low table or platform.
- Ask for a sit or down and reward on the table.
- Practice the release word.
- Introduce the tire jump at ground level, if suitable.
Week 6: Simple Sequences
- Combine tunnel and jump.
- Add a second jump.
- Practice sending to the tunnel from a few feet away.
- Practice front crosses on flat ground.
Week 7: Weave Pole Introduction
- Start with channel weaves or two poles.
- Keep it fun, with frequent rewards.
- Add a short sequence with weaves, tunnel, and jump.
- Continue warm-ups and cooldowns.
Week 8: Review and Plan
- Run a mini course of three or four obstacles.
- Take photos or video to review your handling.
- Note what your dog loved and what was tough.
- Schedule a class or a trainer visit, especially before contact obstacles.
- Decide your goals: fun, fitness, or competition.
After Week 8
Keep practicing foundations and add new obstacles slowly. Visit your vet regularly. Most of all, keep it fun.
Shopping Checklist
Training Supplies
- Soft, tiny training treats
- Treat pouch or belt
- Favorite tug or fetch toy
- Clicker (optional)
- Long line (15 to 30 feet) for outdoor recall work
Agility Equipment
- Collapsible practice tunnel
- Adjustable low jump with lightweight bars
- Hoop or tire jump with a breakaway or wide design
- Weave poles with guides
- Low pause table or non-slip platform
- Non-slip mats
Safety and Comfort
- Well-fitting harness for walks
- ID tag and updated microchip details
- GPS tracker for outdoor off-leash practice
- Paw balm and paw wipes
- Collapsible water bowl
- Cooling mat or towel for hot days
- Dog coat for cold days
- First aid kit
Recovery and Rest
- Supportive dog bed
- Lick mat or chew for cooldowns
- Crate or travel mat
- Car seat cover for travel to classes
For You
- Athletic shoes with good grip
- Water bottle
- Notebook for tracking progress
Find training treats, toys, beds, and walking gear at Pet Supply Go.
Final Thoughts
Agility is one of those rare activities that makes both ends of the leash happier. Your dog gets exercise, brain work, and a job to do. You get a stronger bond, better communication, and a lot of laughs when your dog decides the tunnel is the best thing ever and runs it nine times in a row.
You do not need to compete. You do not need expensive equipment. You need a healthy dog, a safe space, tasty rewards, and a plan to go slowly. Start with a vet visit. Build your foundations. Introduce one obstacle at a time, keep the jumps low, and let your dog set the pace. Warm up, cool down, and rest.
Most importantly, remember that agility is a game. Some days your dog will fly. Other days they will wander off to sniff a flower. Both days count. Keep it positive, keep it safe, and keep it fun, and you will build skills and memories that last for years.
30 Frequently Asked Questions About Dog Agility Training
1. What is dog agility training?
Dog agility training teaches a dog to run a course of obstacles, such as jumps, tunnels, weave poles, and ramps, guided by a handler. It builds fitness, focus, confidence, and teamwork, and can be done for fun at home or in competition.
2. How do I start agility training with my dog?
Start with a vet check, then teach foundation skills like focus, recall, targeting, and a release word. Introduce low, safe obstacles one at a time, beginning with the tunnel and ground-level jumps. Keep sessions short, use rewards, and never force your dog.
3. What age can a dog start agility?
Puppies can start foundation skills and gentle body-awareness games early, but should avoid jumping at height and repetitive impact until growth plates close, often around 12 to 18 months and later for giant breeds. Ask your vet for guidance on your dog.
4. Is agility safe for puppies?
Gentle, low-impact activities like tunnels, targeting, and balance work are generally fine. Avoid high jumps, repetitive jumping, and steep contact obstacles until your vet confirms your puppy is mature enough.
5. Can any breed do agility?
Most healthy dogs can enjoy agility, including mixed breeds and small dogs. Some breeds, such as Border Collies, are especially fast, but attitude and health matter more than breed. Flat-faced and long-backed breeds need extra care.
6. Can small dogs do agility?
Yes. Small dogs are often quick and enthusiastic. Use low jumps, appropriately sized equipment, non-slip surfaces, and keep them warm in cold weather. Check with your vet about knee and back health.
7. Can older dogs do agility?
Many senior dogs enjoy gentle, low-impact agility with veterinary approval. Use low or ground-level obstacles, short flat tunnels, targeting, and balance work, keep sessions short, and watch for stiffness or fatigue.
8. What equipment do I need to start dog agility?
A beginner can start with a collapsible tunnel, one or two low adjustable jumps, a pause table or platform, a target mat, treats, and a safe, flat training area. Add weave poles later. Contact obstacles are best used with a trainer.
9. Can I do agility training at home?
Yes. Many people train in a yard, garage, or living room. Use safe, stable equipment, non-slip surfaces, and low heights. For contact obstacles like the A-frame and dog walk, professional equipment and instruction are strongly recommended.
10. How high should I set jumps for a beginner?
Start with the bar on the ground, then raise it only a few inches. Keep heights low, well below your dog’s elbow, until your dog is fully grown and your vet agrees. Never jump puppies at height.
11. What is the easiest agility obstacle to teach first?
The tunnel. Most dogs find it fun, it involves no jumping, and it builds confidence. Start with a short, scrunched tunnel and lengthen it gradually.
12. How do I teach my dog weave poles?
Use a gradual method such as channel weaves, two-by-two, or guide wires. Start with a few poles, reward often, and keep sessions short. Many dogs take weeks or months to weave reliably, so be patient.
13. How long should agility training sessions be?
Five to fifteen minutes is plenty, especially at first. Several short sessions are better than one long one. End while your dog is still eager.
14. What treats are best for agility training?
Small, soft, smelly, high-value treats that can be eaten quickly. Single-ingredient options work well. Keep pieces tiny, and count the calories toward your dog’s daily food.
15. Do I need a clicker?
No. A clicker is helpful for precise timing, but a consistent marker word like “yes” works just as well.
16. Why does my dog refuse to go through the tunnel?
Your dog may find it dark, long, or unfamiliar. Shorten and widen the tunnel, let your dog see through it, use a helper, and reward small steps. Never push your dog in.
17. How can I stop my dog from knocking bars?
Lower the jump, slow down, and practice rhythm with ground poles. Check for pain, fitness, or vision issues if it happens often.
18. Should my dog wear a collar during agility?
Many handlers remove collars during obstacles because collars can snag on equipment or in tunnels. Remove any clothing, too. Keep identification up to date for the trip to and from the training area.
19. Is agility hard on a dog’s joints?
It can be if done incorrectly, such as too much jumping, high jumps, slippery surfaces, or overtraining. With vet approval, low heights, good surfaces, warm-ups, rest days, and a healthy weight, agility can be a safe and healthy activity.
20. What are the signs my dog is hurt?
Limping, yelping, stiffness, reluctance to jump or climb, licking a spot, loss of enthusiasm, or changes in gait. Stop the session, rest your dog, and call your vet if signs last.
21. How often should I train agility?
Two to four short sessions a week is plenty for most beginners, with rest days in between. Foundation games can be practiced daily in short bursts.
22. Do I need to take classes?
Not strictly, but classes help, especially for contact obstacles, weave poles, and handling. A good instructor spots problems and keeps training safe.
23. How do I find a good agility instructor?
Look for positive reinforcement methods, a focus on safety, experience with different dogs, small classes, and safe surfaces. Watch a class first, and avoid anyone who uses force or pushes dogs too fast.
24. Can I compete with a mixed-breed dog?
Yes. Many organizations welcome mixed breeds, sometimes through special programs. Check each organization’s current rules on eligibility, age, and registration.
25. What is a pause table in agility?
A raised table where the dog must stop and sit or lie down for a few seconds. It teaches control and gives the dog a short break. Start with a low, non-slip platform.
26. How do I teach a release word?
Ask your dog to sit or stay, wait a moment, say your release word, such as “okay,” and reward. Practice in different situations. It teaches your dog to wait until told to move.
27. How do I warm up my dog before agility?
Start with a brisk walk, gentle trotting, figure-eights, a few sit-to-stand repetitions, and light stretching, for five to ten minutes. Finish sessions with a slow walk, water, and rest.
28. Can agility help with a shy or anxious dog?
Often, yes. Gradual, positive training builds confidence. Go slowly, never force, and keep sessions short. If fear is intense, work with a certified trainer or veterinary behaviorist.
29. Is agility good for high-energy dogs?
Yes. It burns physical and mental energy and gives energetic dogs a job. Build impulse control first, so excitement stays safe.
30. When should I stop an agility session?
Stop if your dog shows pain, fear, heavy panting, exhaustion, loss of interest, or if conditions are too hot, cold, or slippery. End sessions before your dog tires, and on a positive note
This article is for general information and is not a substitute for professional veterinary or training advice. Before starting agility, talk with your veterinarian, especially if your dog is a puppy, a senior, overweight, or has joint, spine, heart, or breathing problems. If your dog shows pain, limping, labored breathing, or signs of heatstroke, stop and contact a licensed veterinarian right away.
AFFILIATE DISCLOSURE
Petsupplygo.com is a participant in the Amazon Services LLC As an Amazon associate program, I earn from qualifying purchases.This costs you nothing extra and help us keep our guide free.
Add a Comment